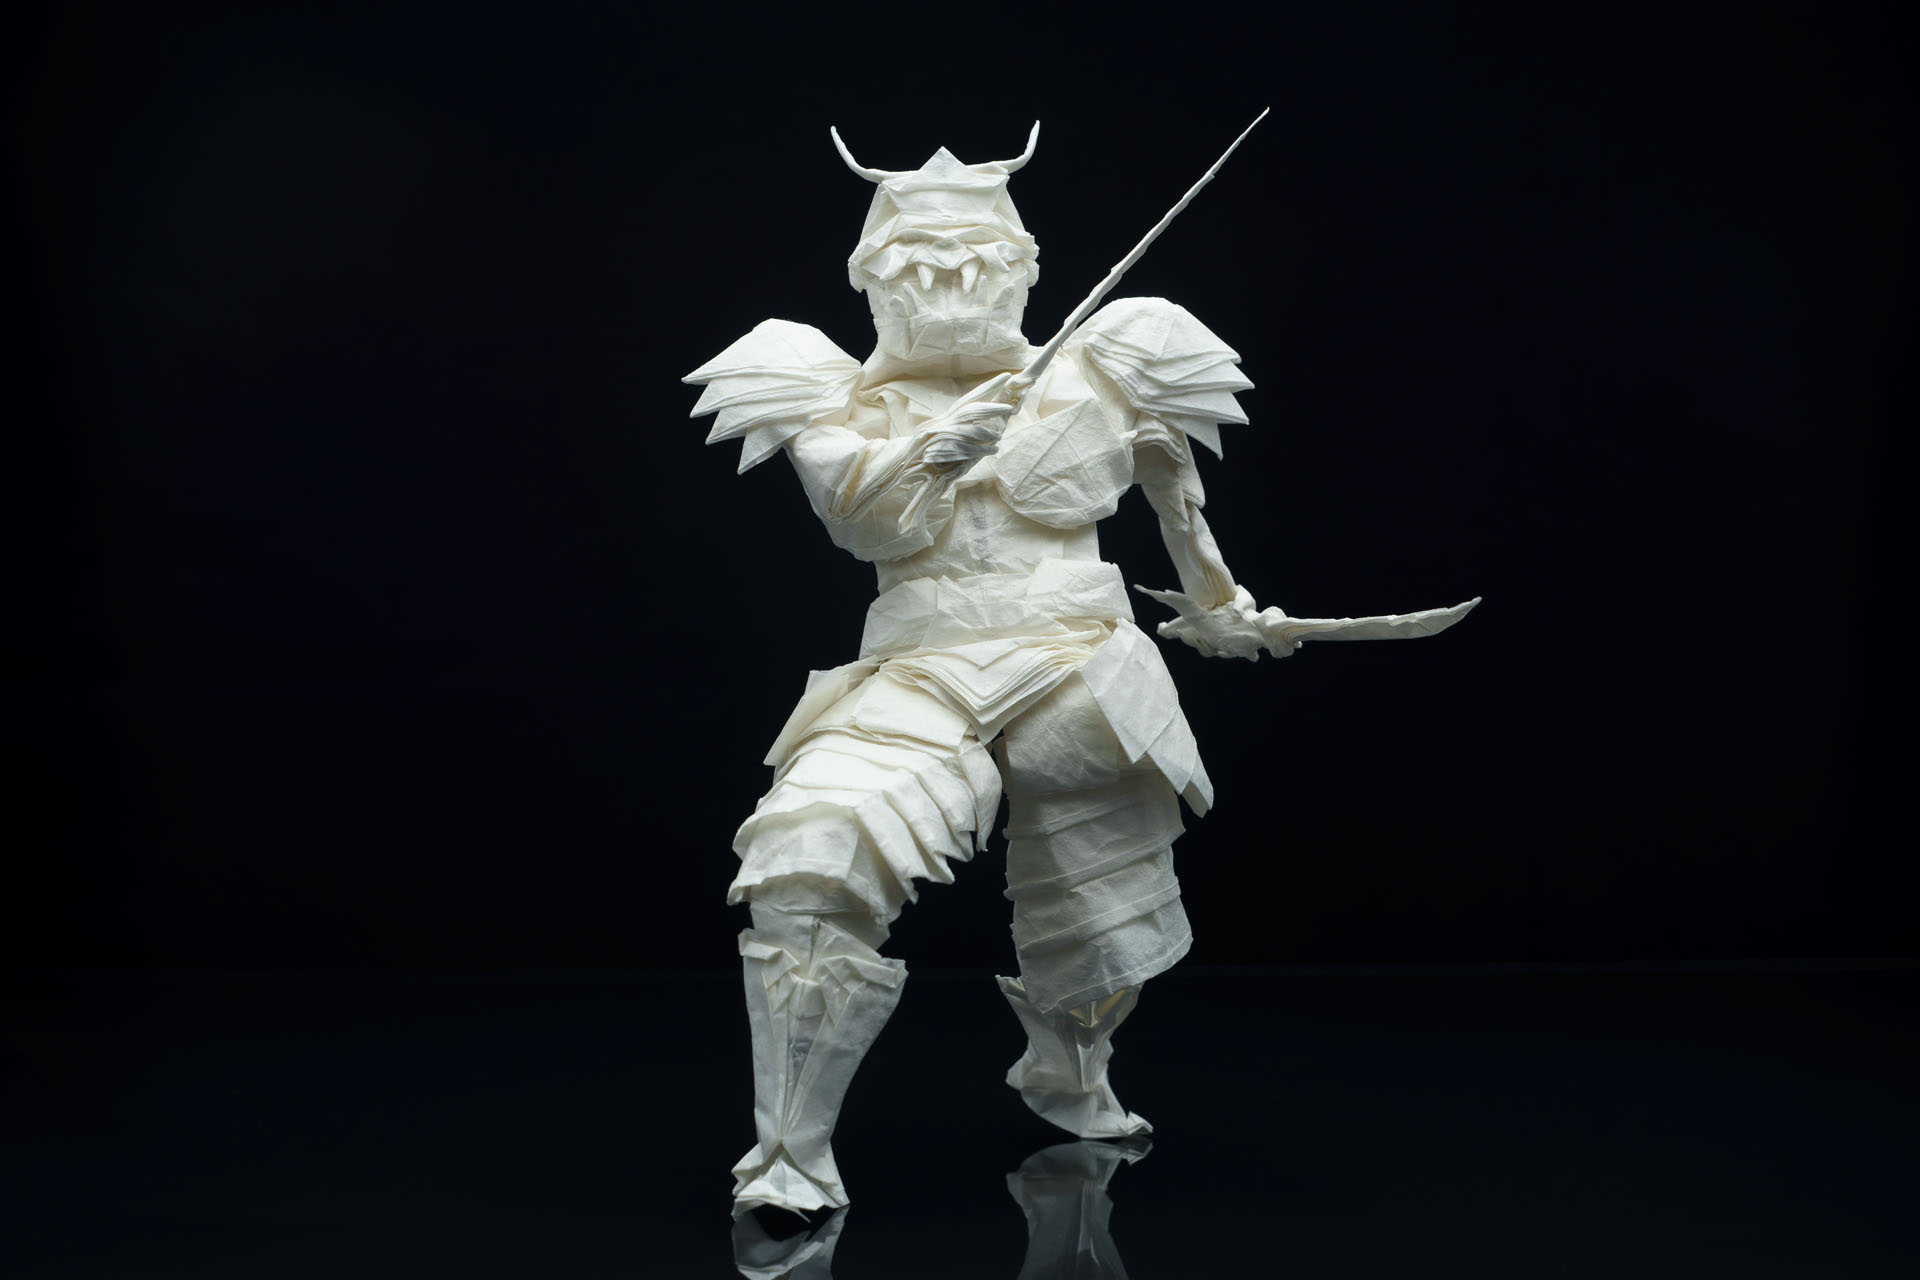
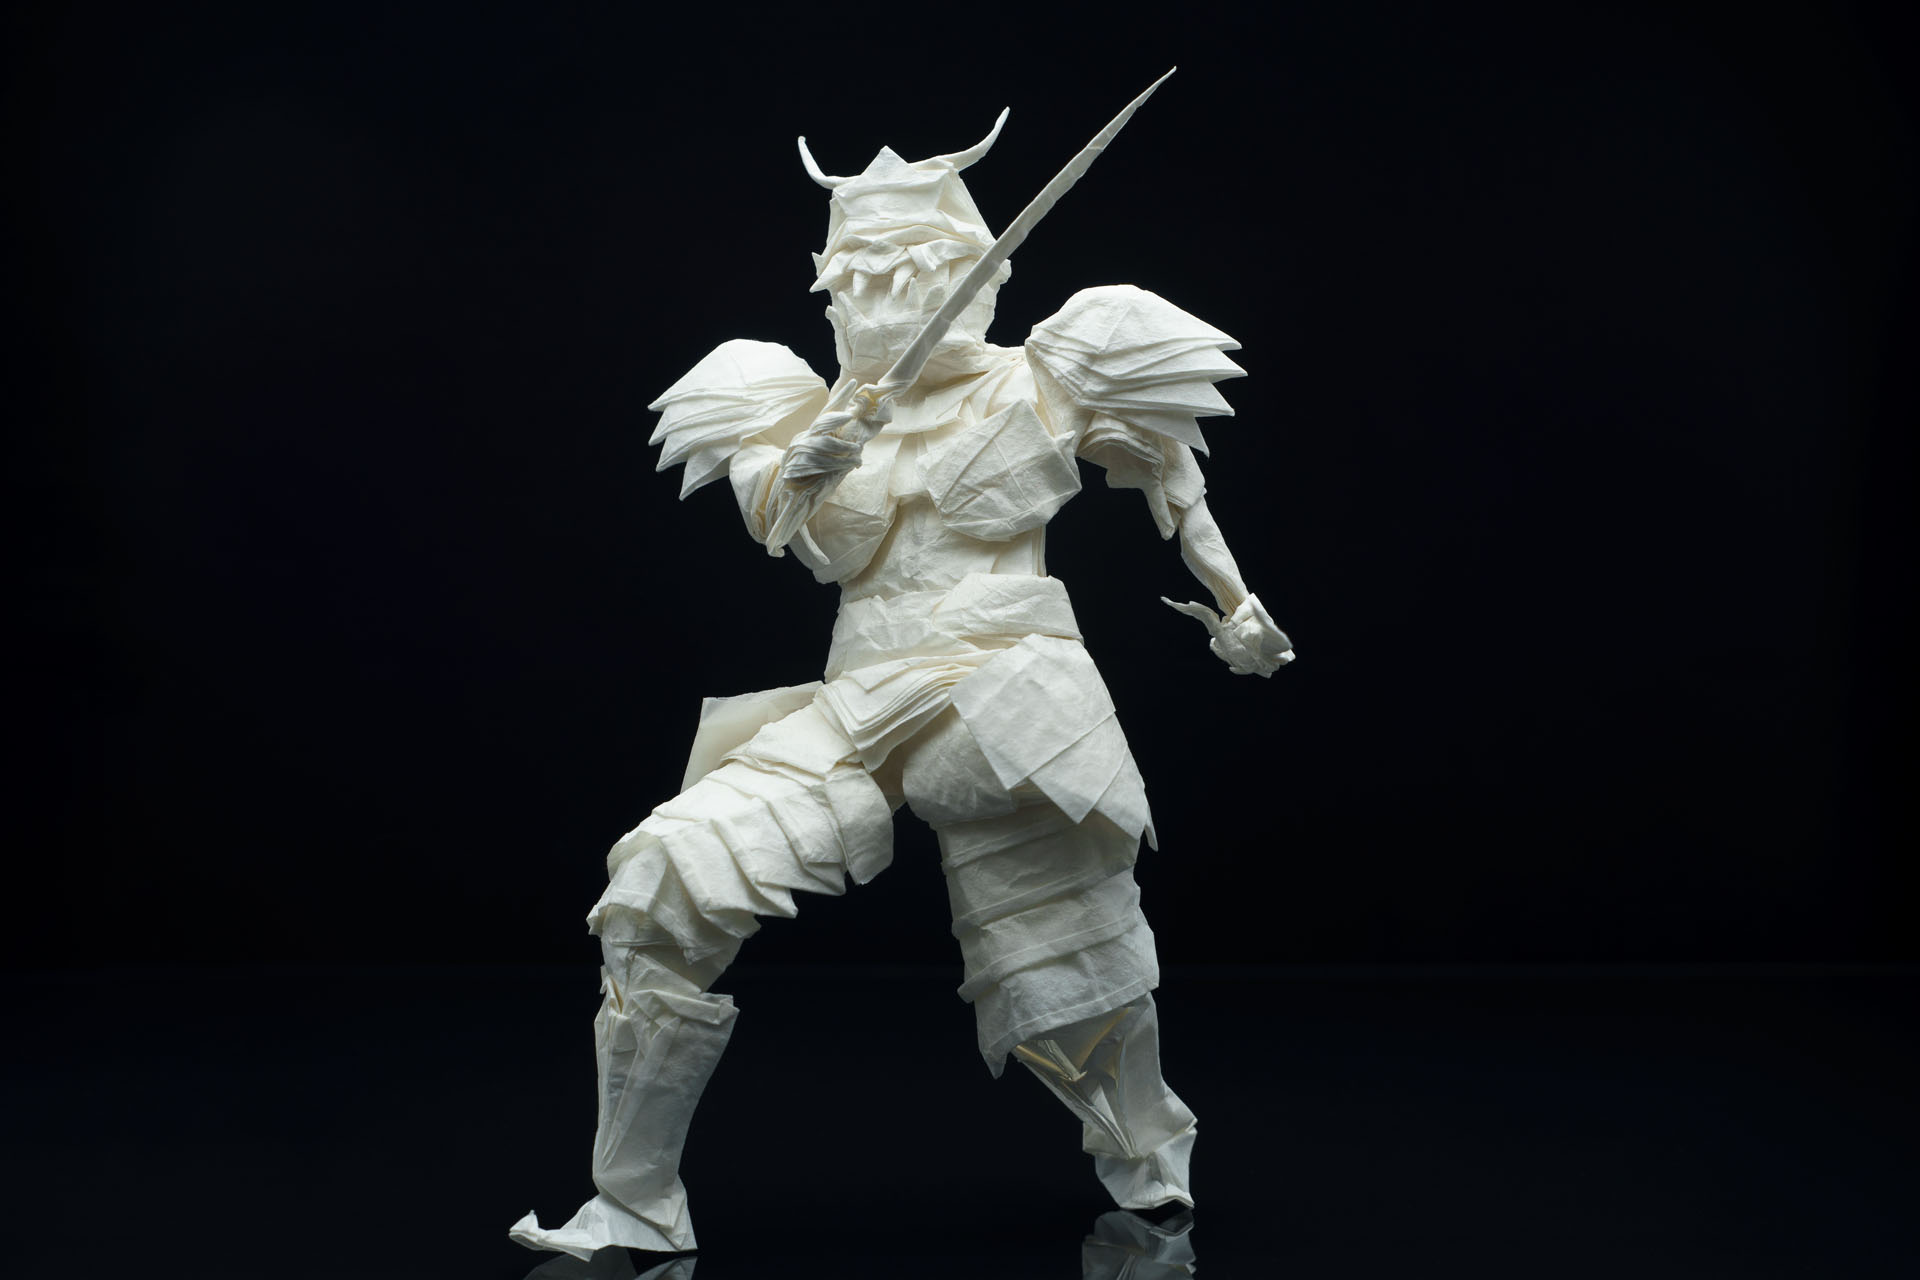
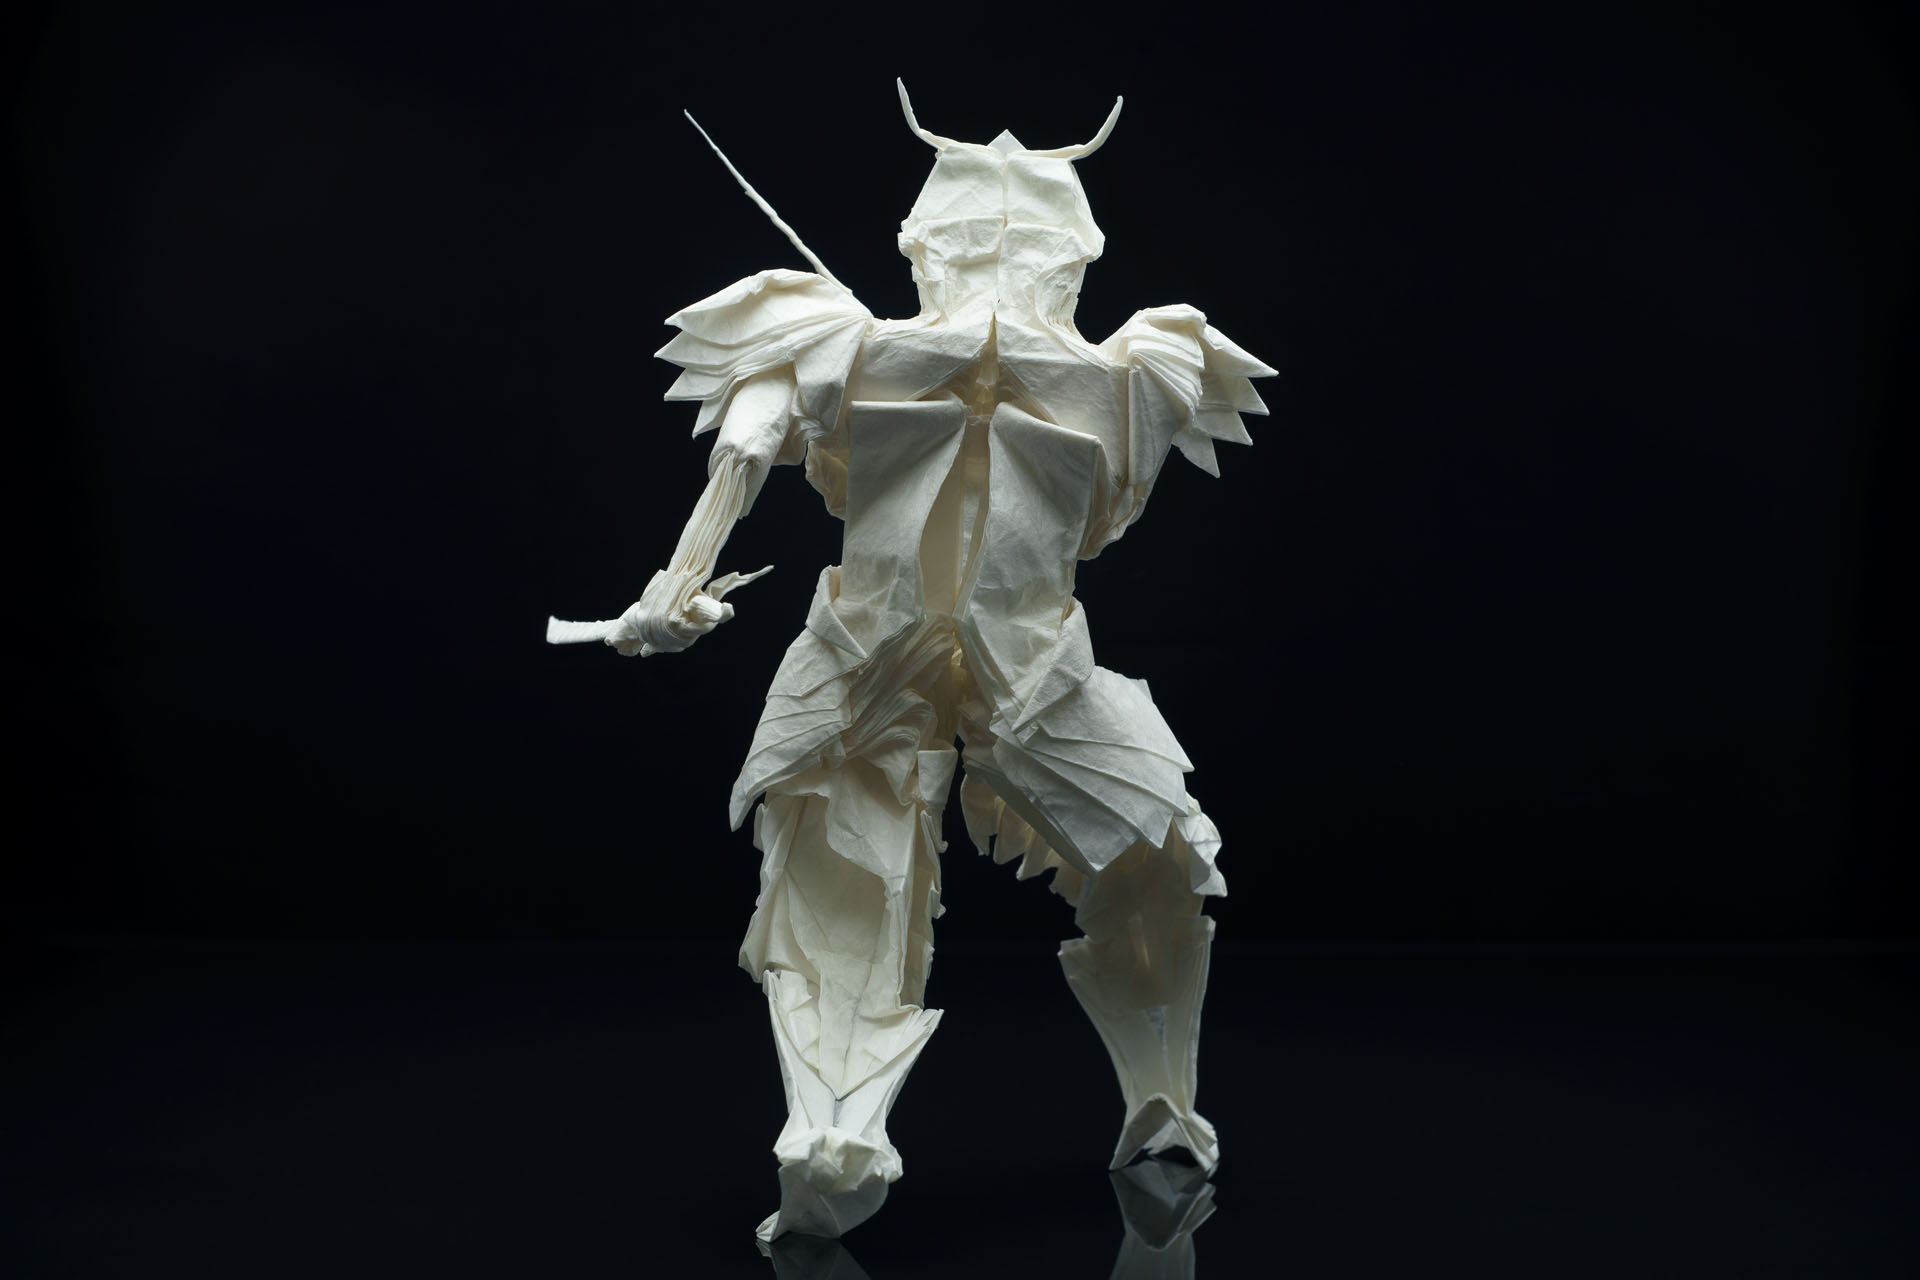
This will be a short walkthrough of my folding process for the Samurai Warrior. This design is quite advanced, even though it doesn’t use dense grid. I wouldn’t recommend to try this, if you don’t know how to read complex crease patterns.
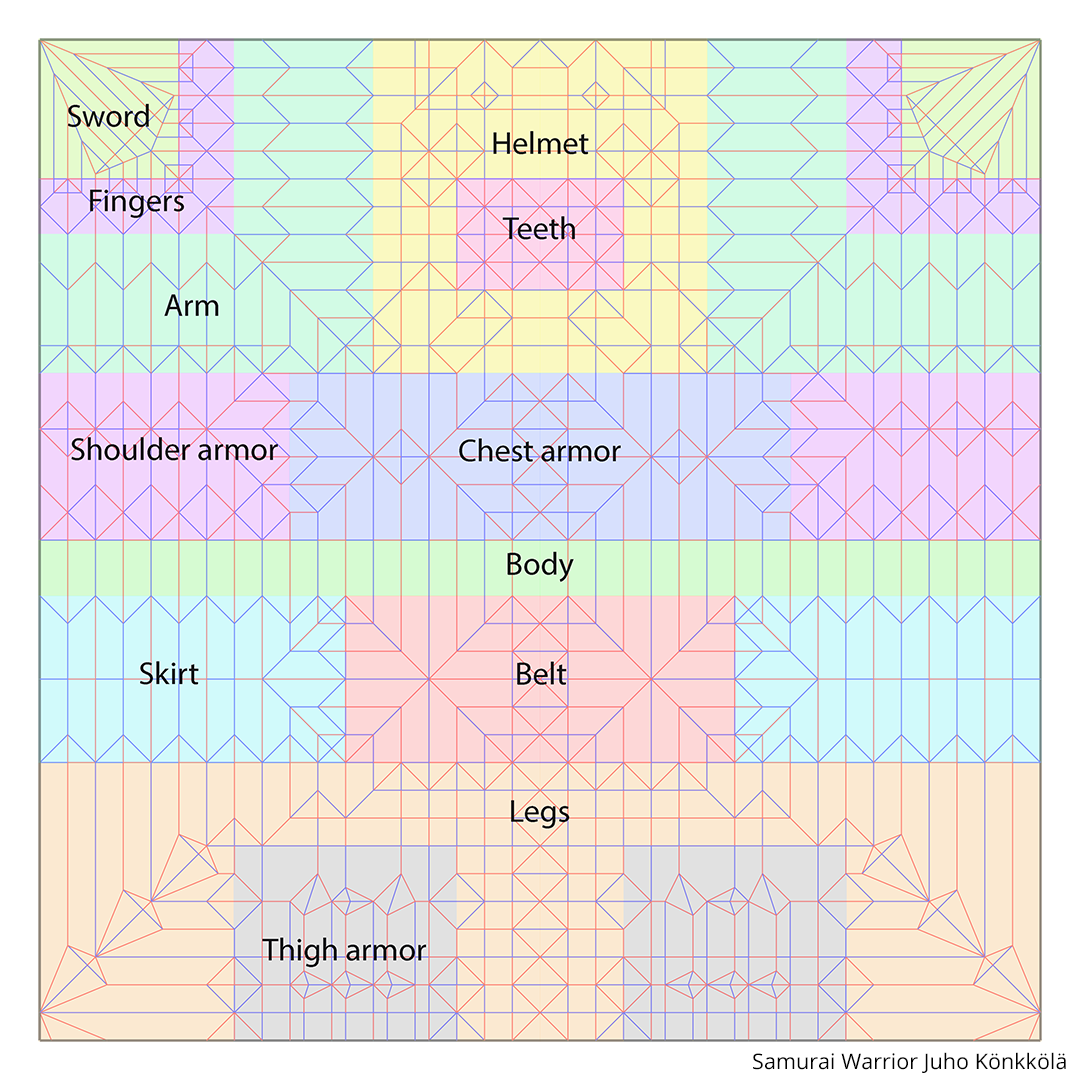
Here is a visualization of how the main features are laid on the sheet. On the corners are the swords and the feet. In the middle of the head are the four canine teeth. On top of them is the flap to create the nose, eyes and extra teeth for the model. On the sides are the flaps for cheeks and under the teeth is the flap for the jaw. On the top of the paper is the top part of the head and the horns.
I recommend to start the collapsing of the model from the head and arms. You will need these folded for the shoulder armor, which is the most difficult part of the model. You will need to fold the arms reversed from the armpits, so they stretch out to the sides when folded. You don’t need to worry about the elbow part yet.
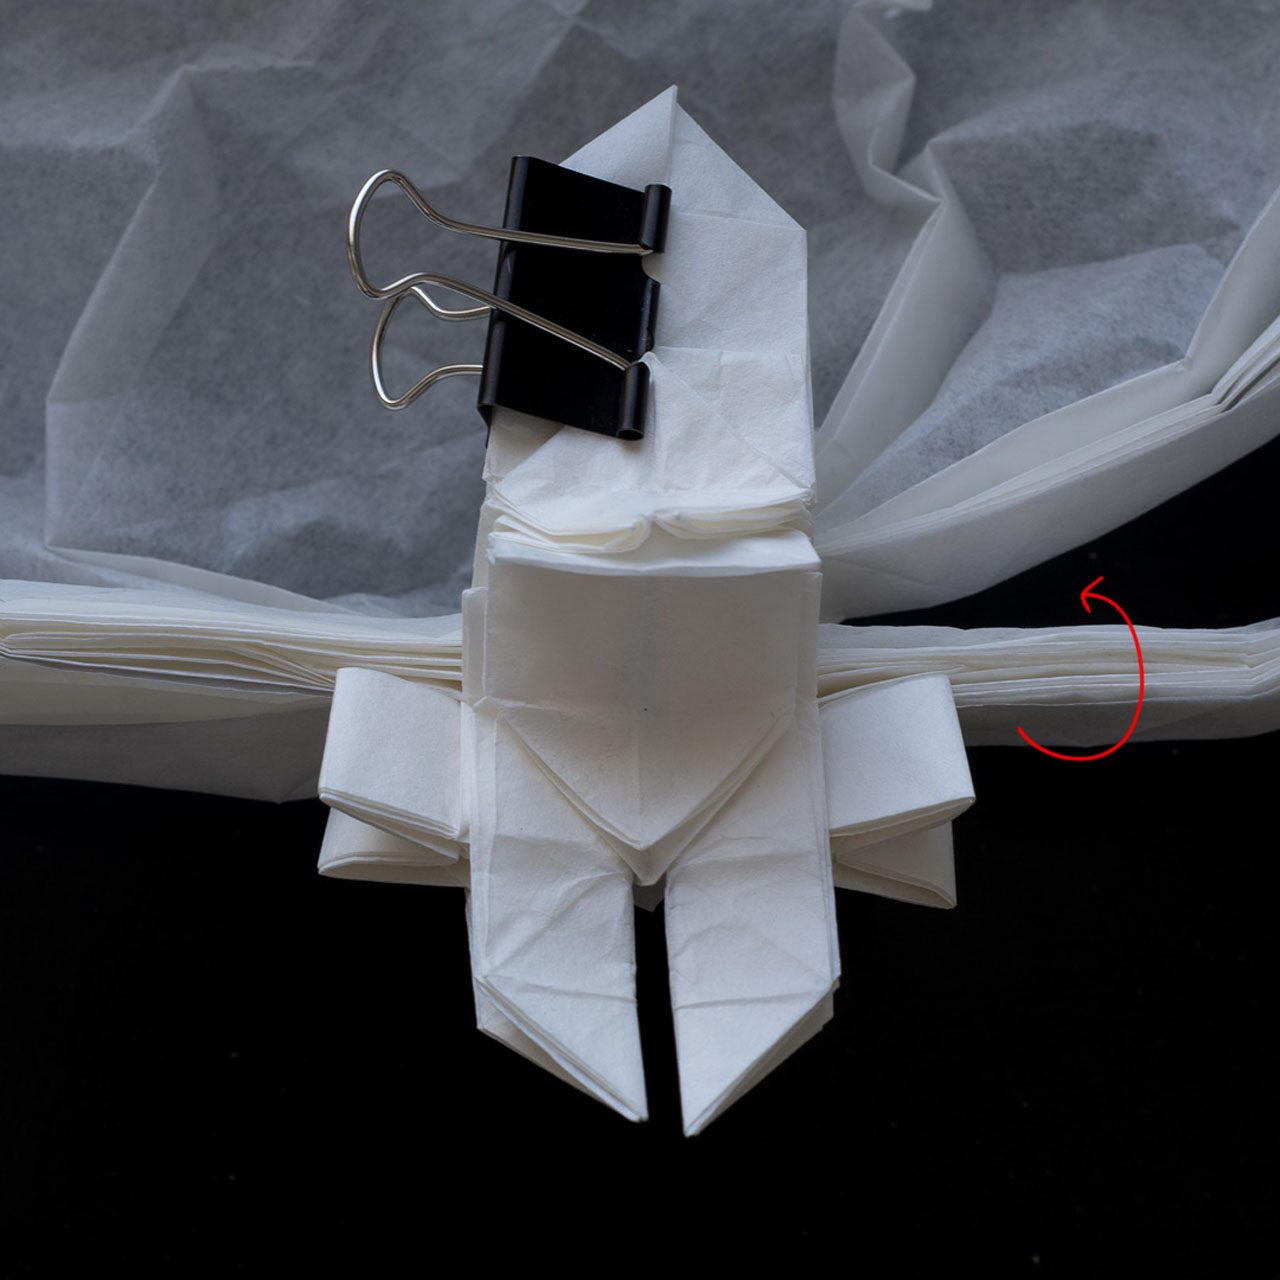
Shoulder armor
Now comes the difficult parts. After the head and arms, begin to fold the chest armor. As you fold these, sink the paper in, like shown in the image and the shoulder armor should fold to the sides. This might be hard to find but the paper should follow the creases from precreasing. At this point You will begin to fold the Shoulder armor. The paper should be able to bee flatten if done correctly.
The result should look like this. Now you will open some of the layers of the arm and fold them over. The parts connected to the shoulder armor can be locked up, so you have to open the model a bit to be able to fold over. It is not important how many layers you fold over, but if you find the right amount, you don’t have to flatten the diagonal folds. You can also rearrange the layers later, if you need to.
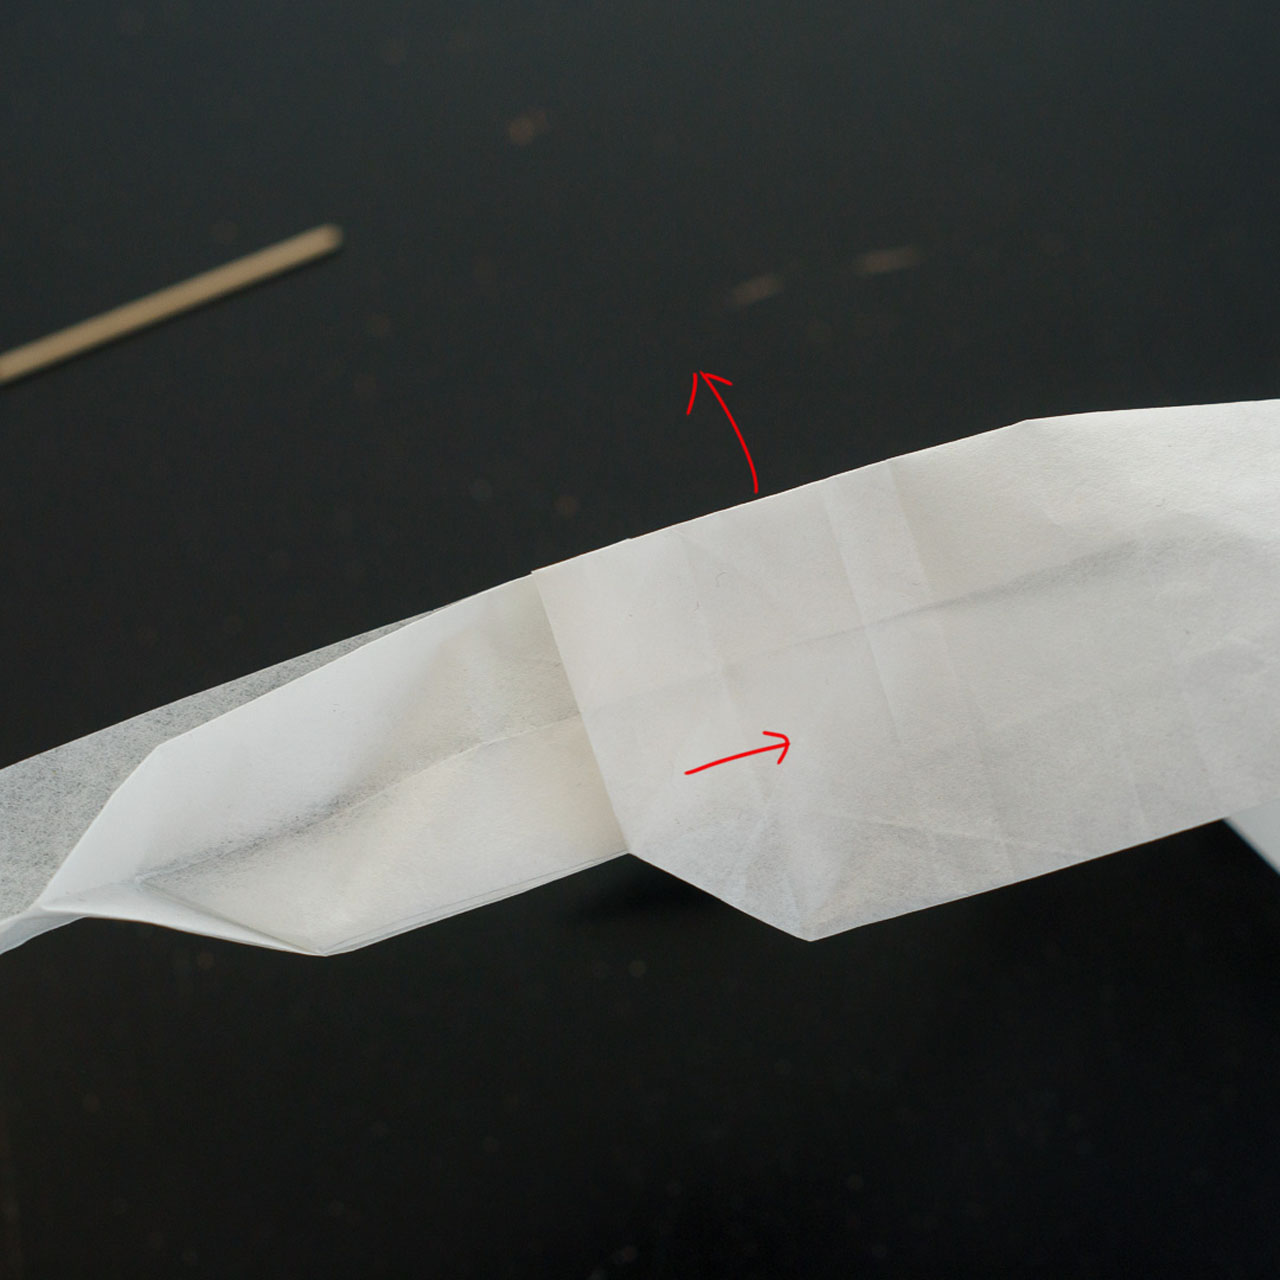
While Turning over the layers, fold the connecting part of the shoulder pads to the arm.
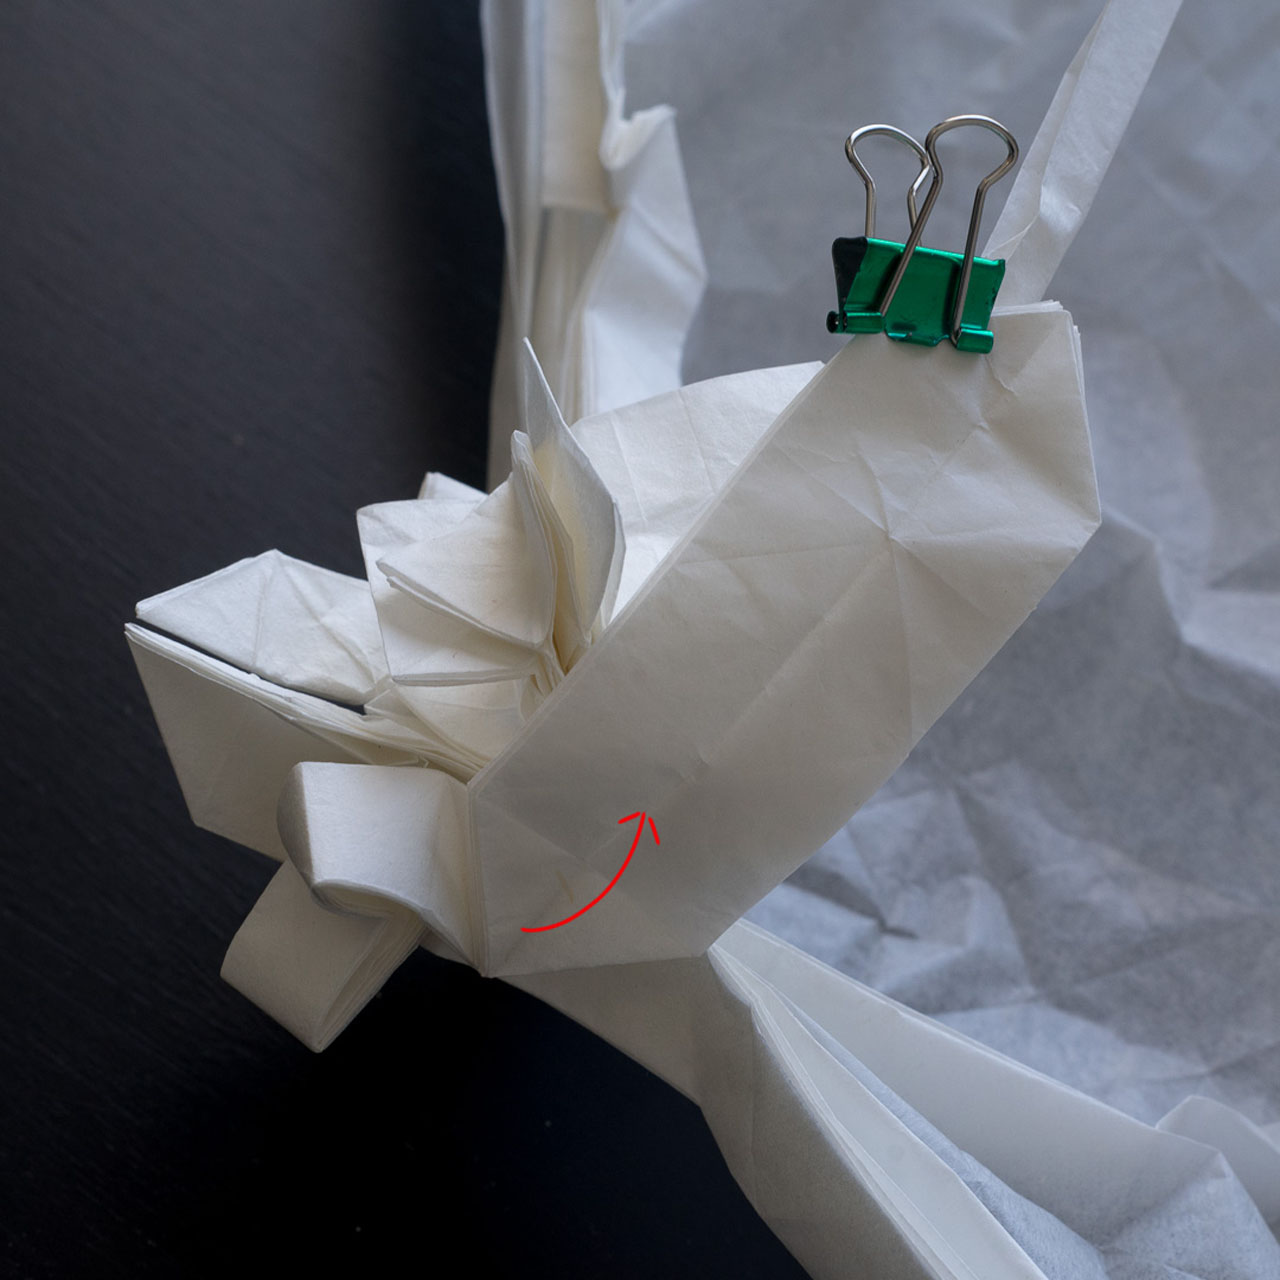
Proceed turning it over. The shoulder armor should be disconnected from the main torso and taking its shape and length.
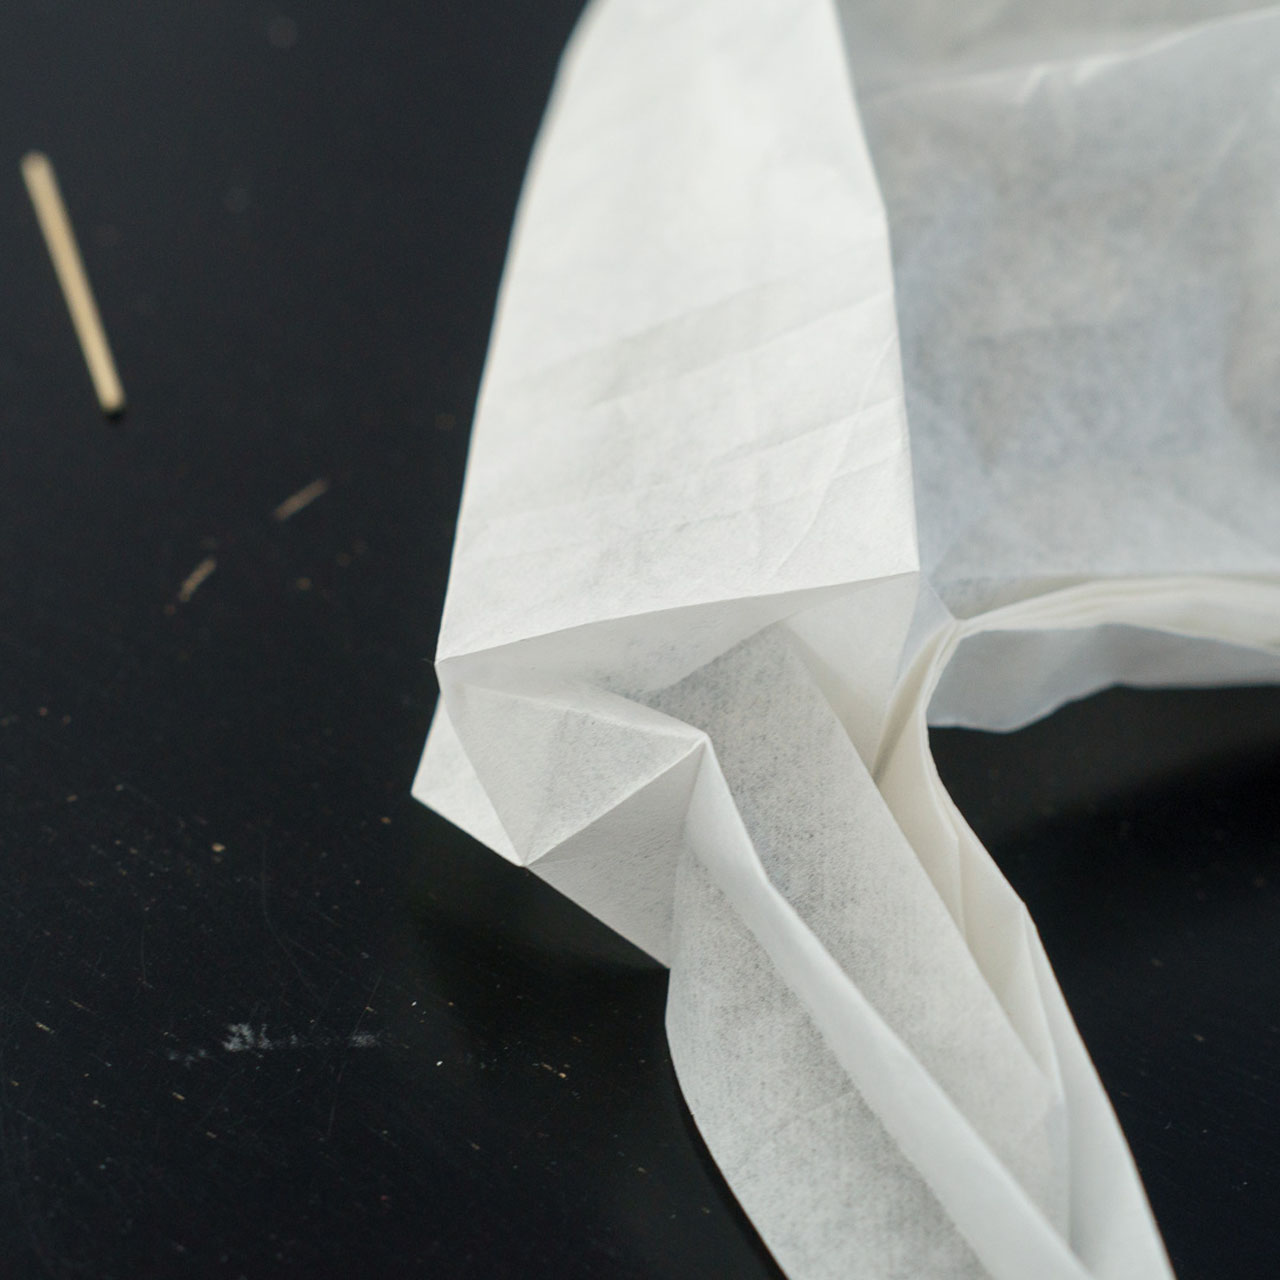
Now start gently pulling the shoulder armor to its final length, which should be two units long. On the arm pit side, next to the chest piece part, the paper should be folding to its final form. Note that there are few layers which prevent this happening, they are locked up in the model. You have to find these layers, open them into their correct position and continue folding the shoulder armor to its shape. Now the shoulder armor should sit flat again.
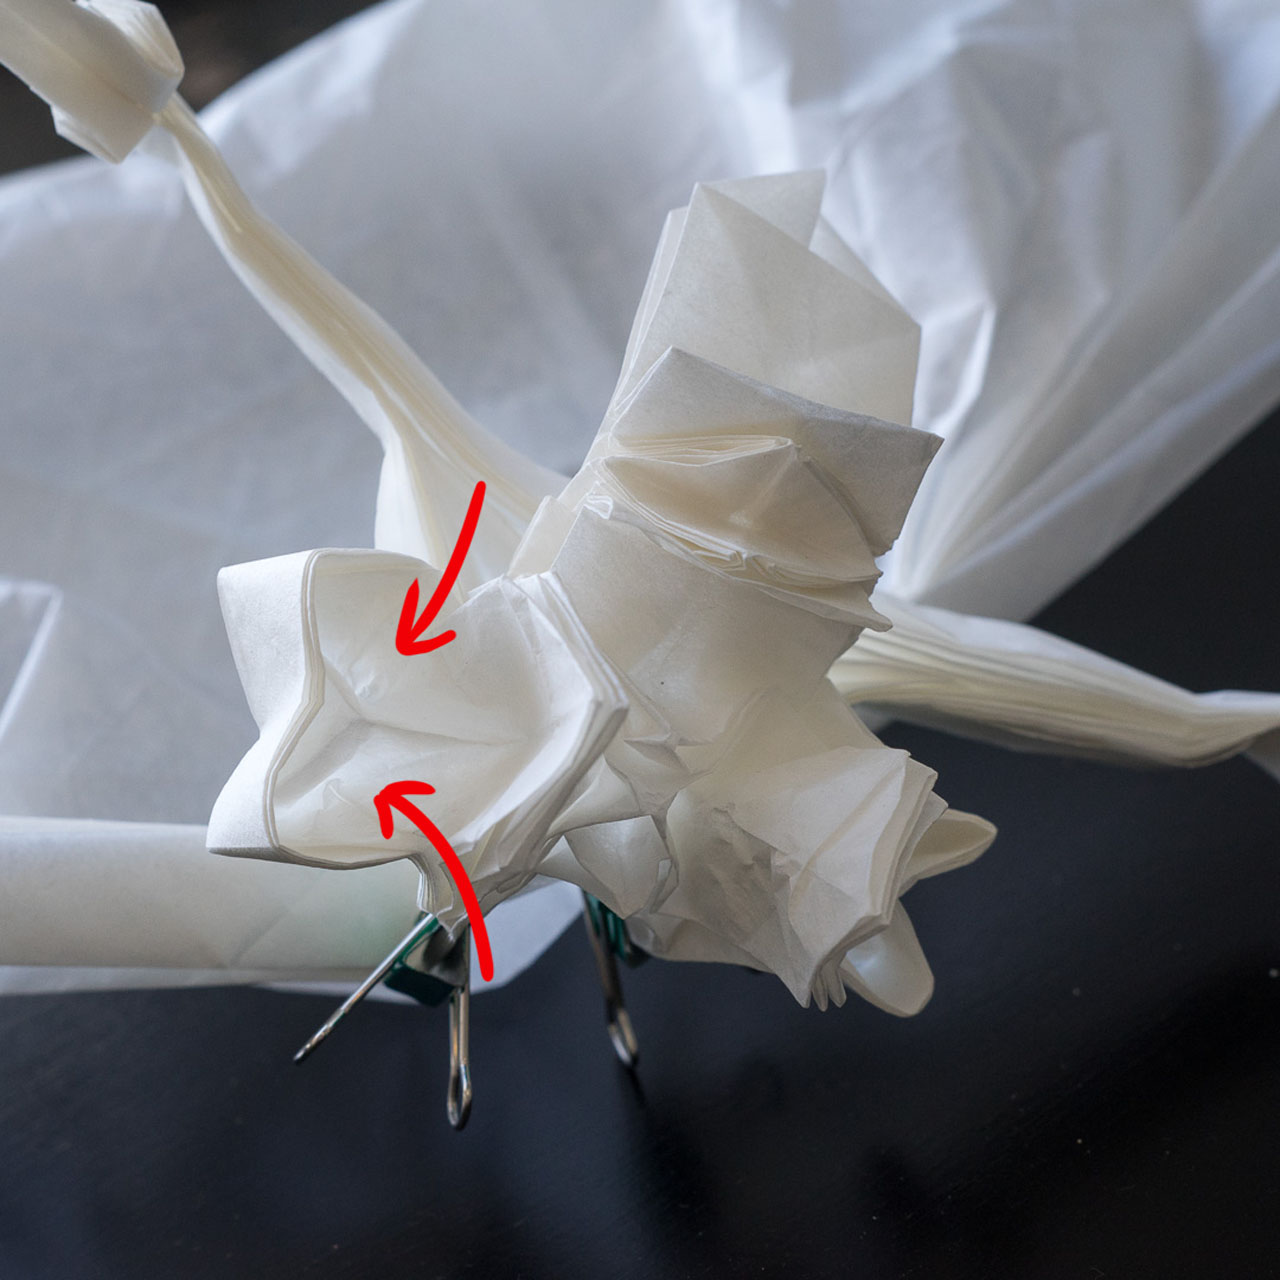
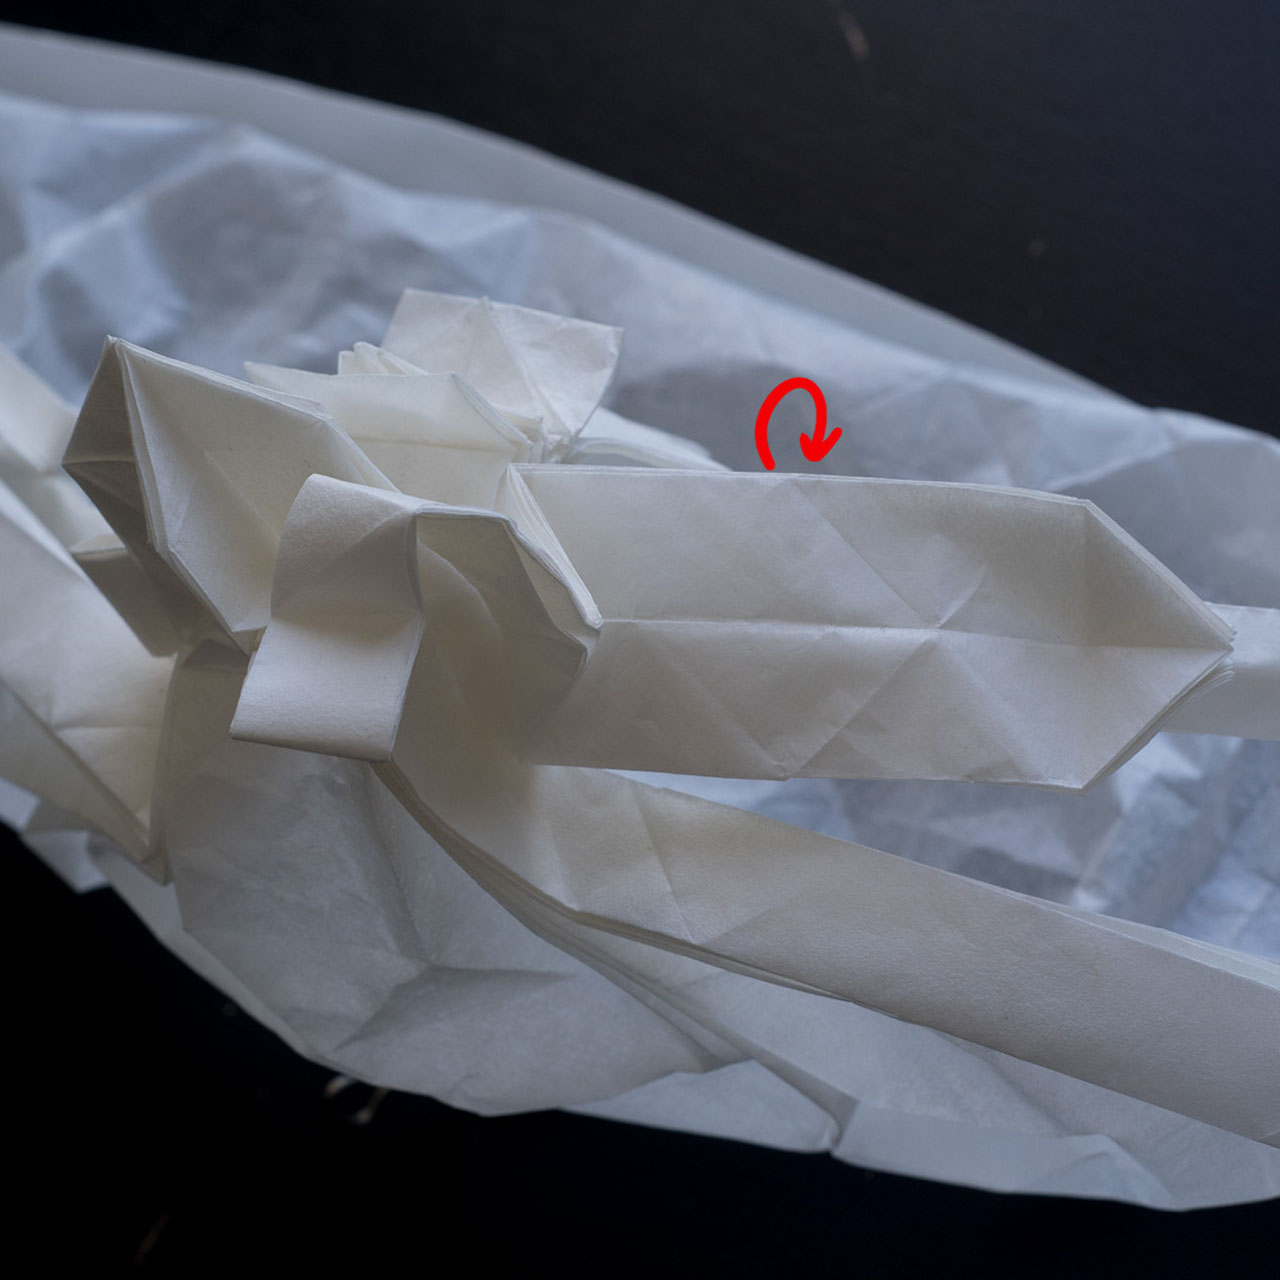
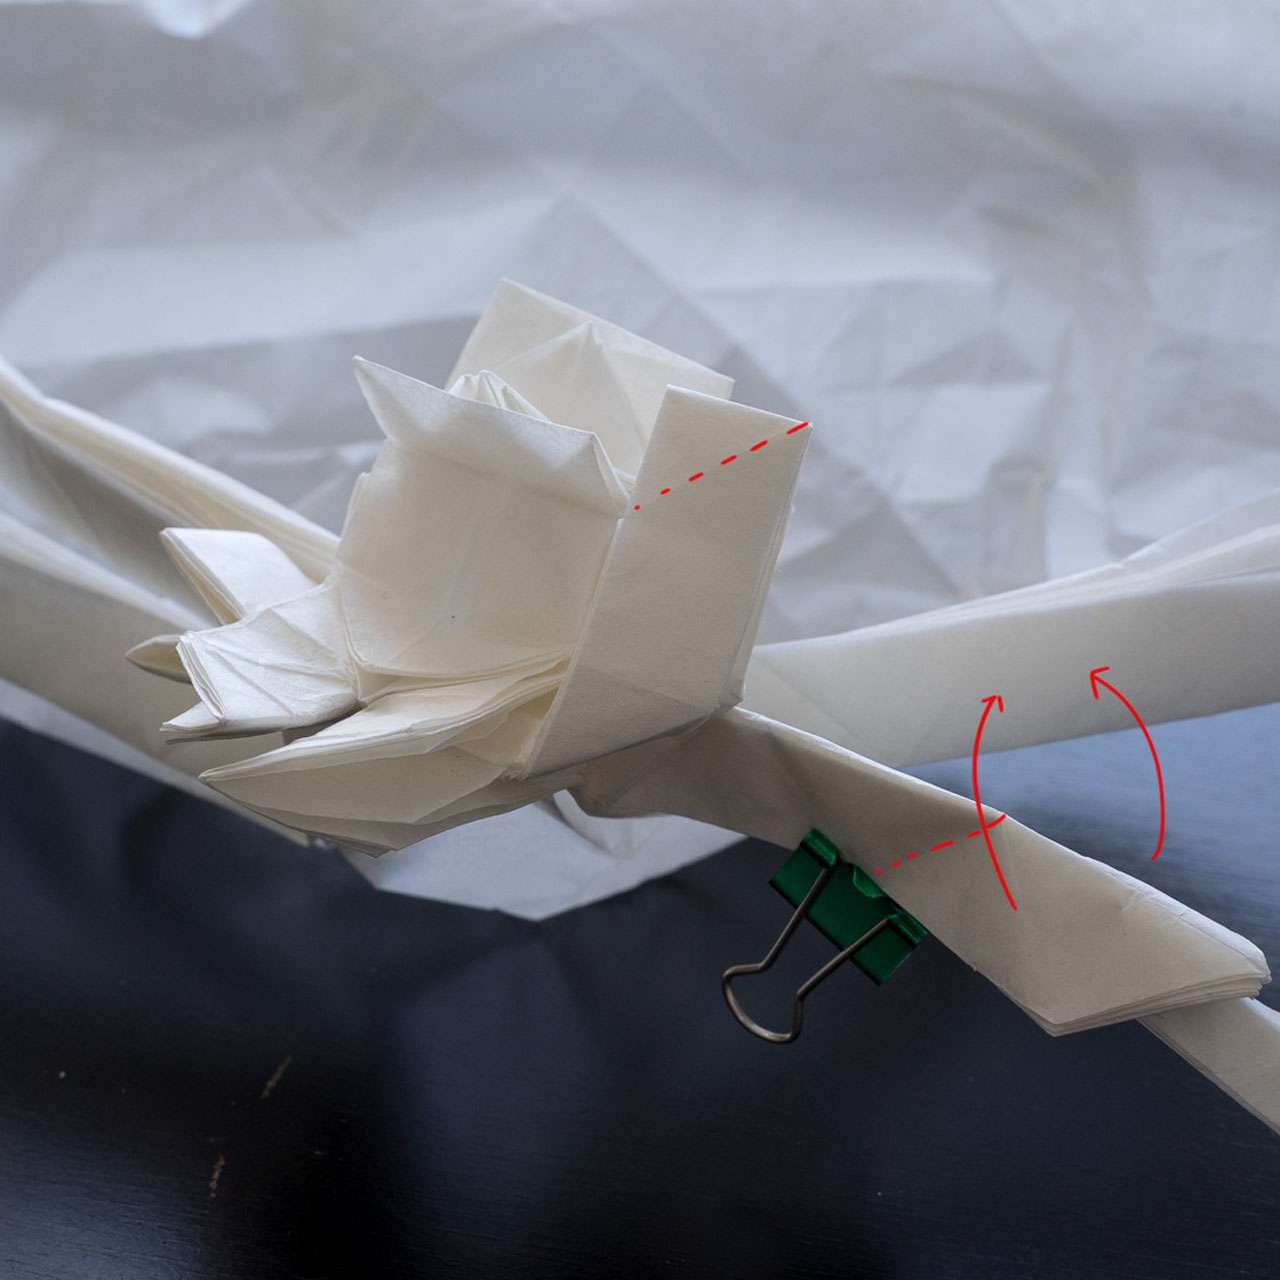
This is the end result of the long process of creating the shoulder armor. It should look like this on the both sides. Now you can slide open the layers and fold the spikes. BE VERY CAREFUL there is not a lot of room to open the layers and the paper is stressed inside the shoulder armor. I failed all of my test folds to this. Somehow managed to do it perfectly on the final model. You can also now fold the elbow by folding the hand over, so the layer arrangement is normal again. This is important so you can fold the fingers correctly.
After the shoulder armor, you can continue to collapse the rest of the model. The hardest part of the model is behind and the rest of the folding is relatively straight forward. The skirt is also folded reversed and will be quite tedious to collapse into its final shape.
Thigh armor
When folding the legs, start doing the inner part first and and fold it like in the picture. You do the same steps on both sides of the thigh armor. Then you can sink the flap in and begin to open the edge of the paper.
while doing this, you can start to fold the edge side of the widening structure. The edge layers are folded behind the thigh armor.
The result should look like this, three units wide thigh armor. Now you can sink in the corner.

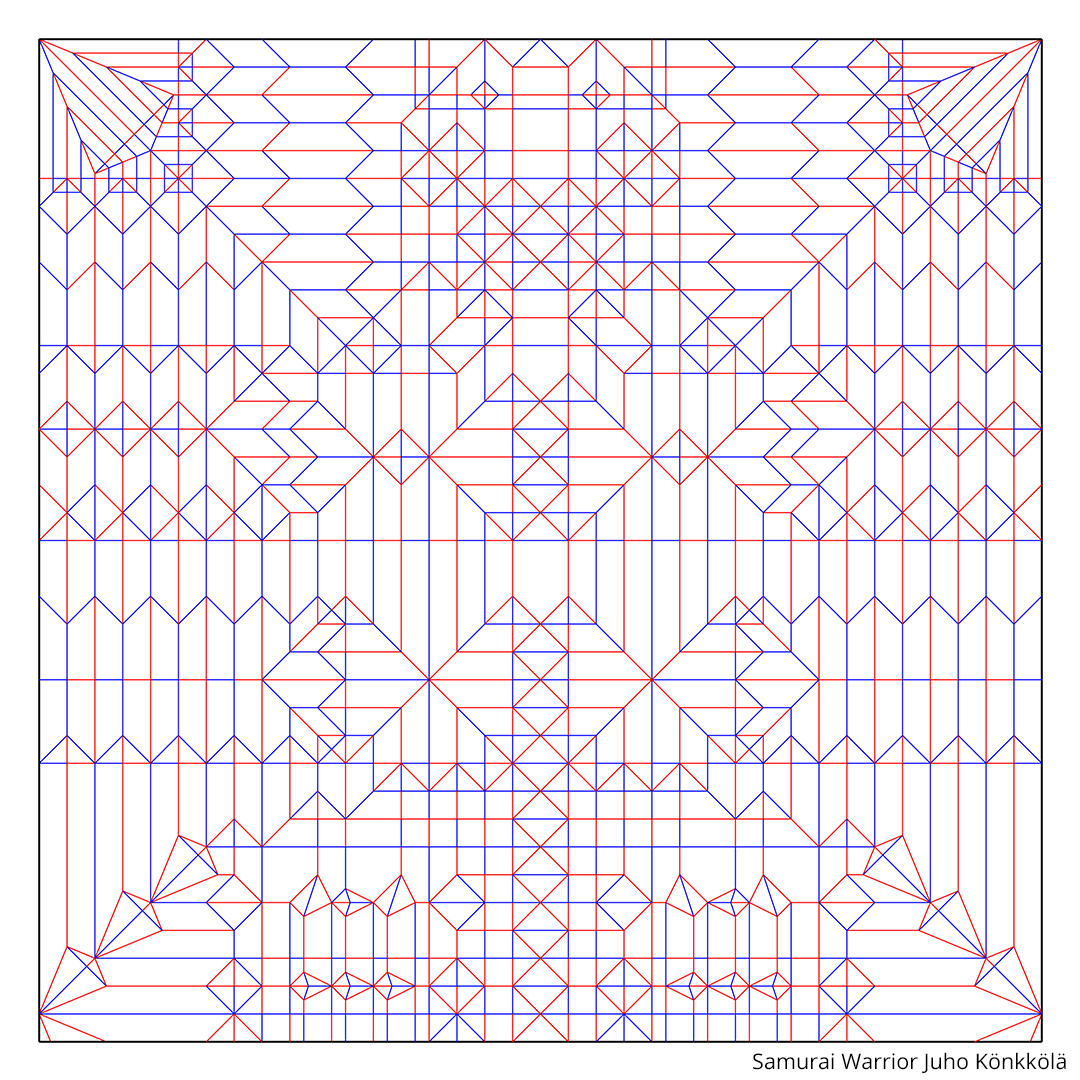
The base should look like this. This step is really far away from the finished model. There is a lot of work to do. I’ll compile here some of the steps to help you get going with the model. There will be a lot of sink folds.
When opening the legs to be two units wide, they won’t lie flat after it. You will have to fold the 3×1 fold behind the model to help the leg sit 2 wide. You will also have to fold it center. There are few parts that prevent you to do this, so you have to fold them to make the leg sit better again. Then you can start to fold the boot.
For the belt, fold the flap thinner and to the side and curve it behind the model.
For the skirt, you spread the layers and shape it to sit with the leg. Be careful with the edge layer, it will be very stressed. I left it open for the rest of the folding process to prevent ripping.
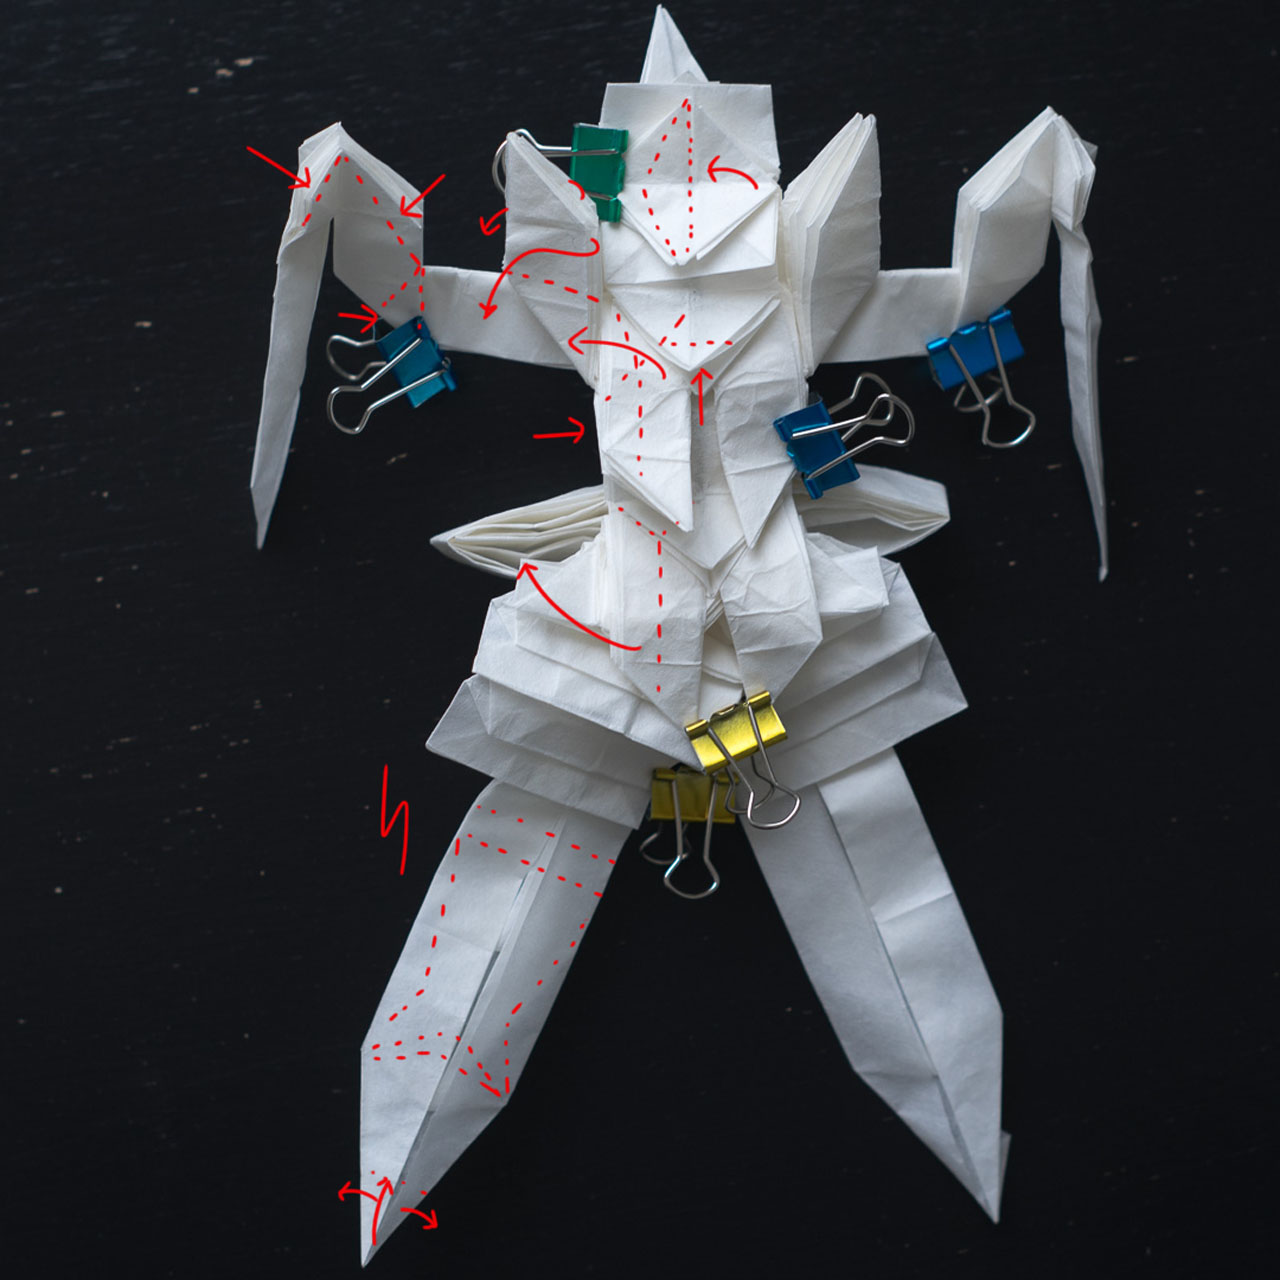
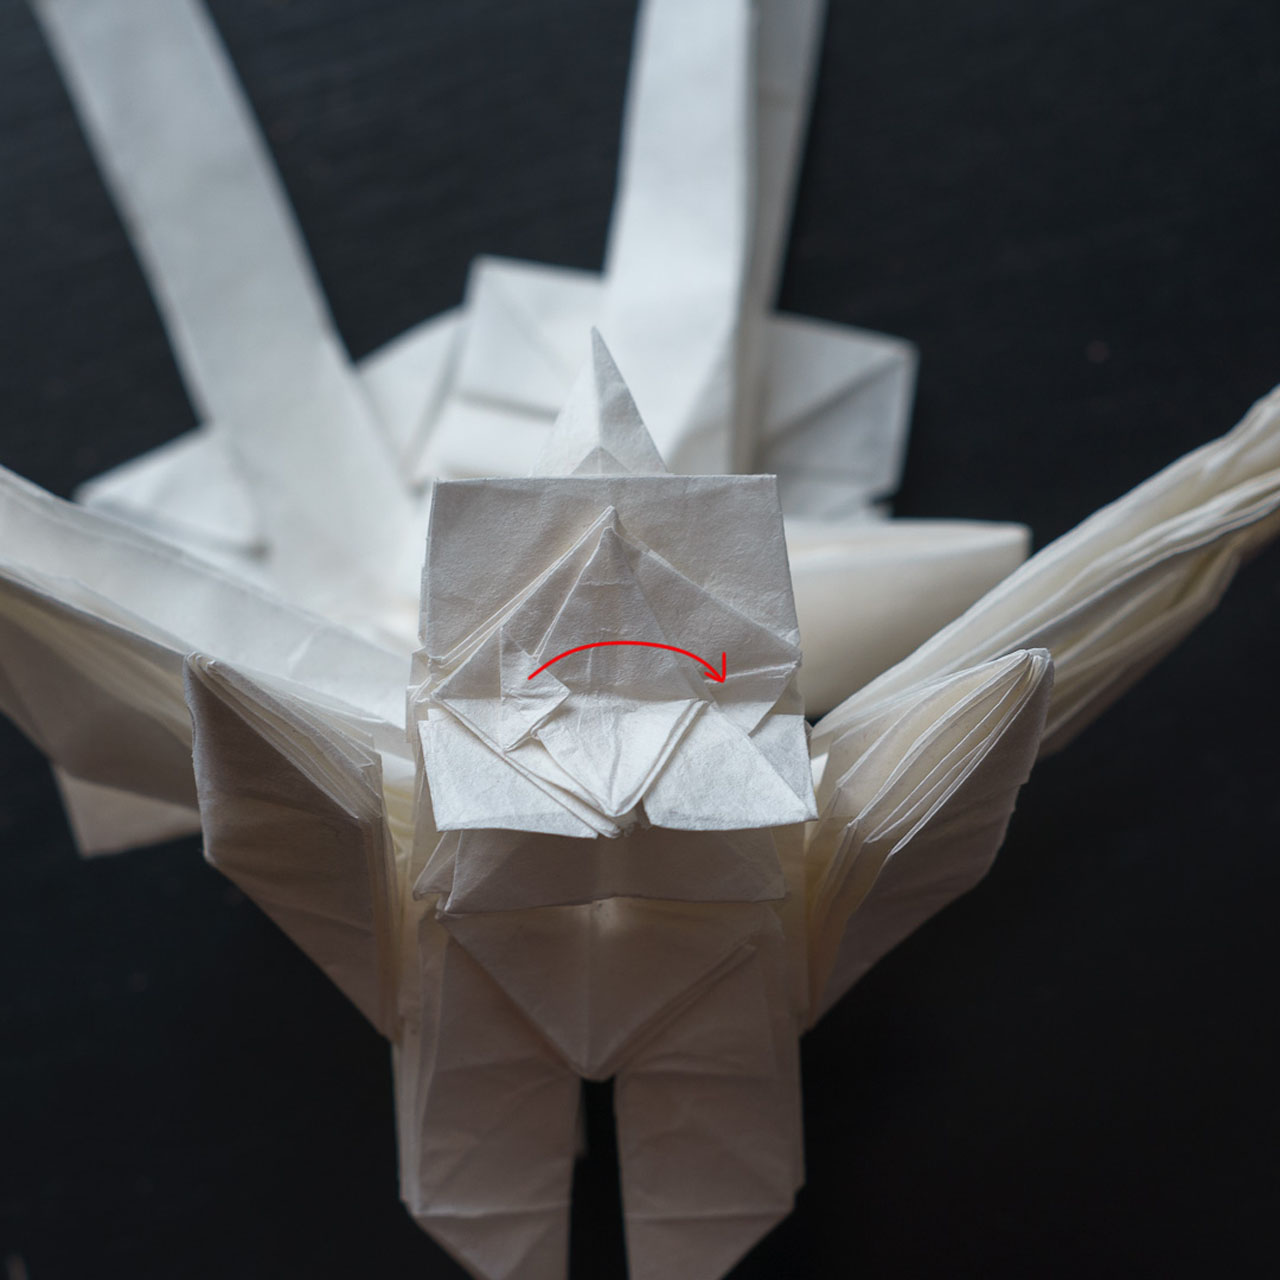
On chest piece, you will sink the outer edges in to make it thinner and then you spread the flap open to the side. from the two tips you can fold small spiky details to the side.
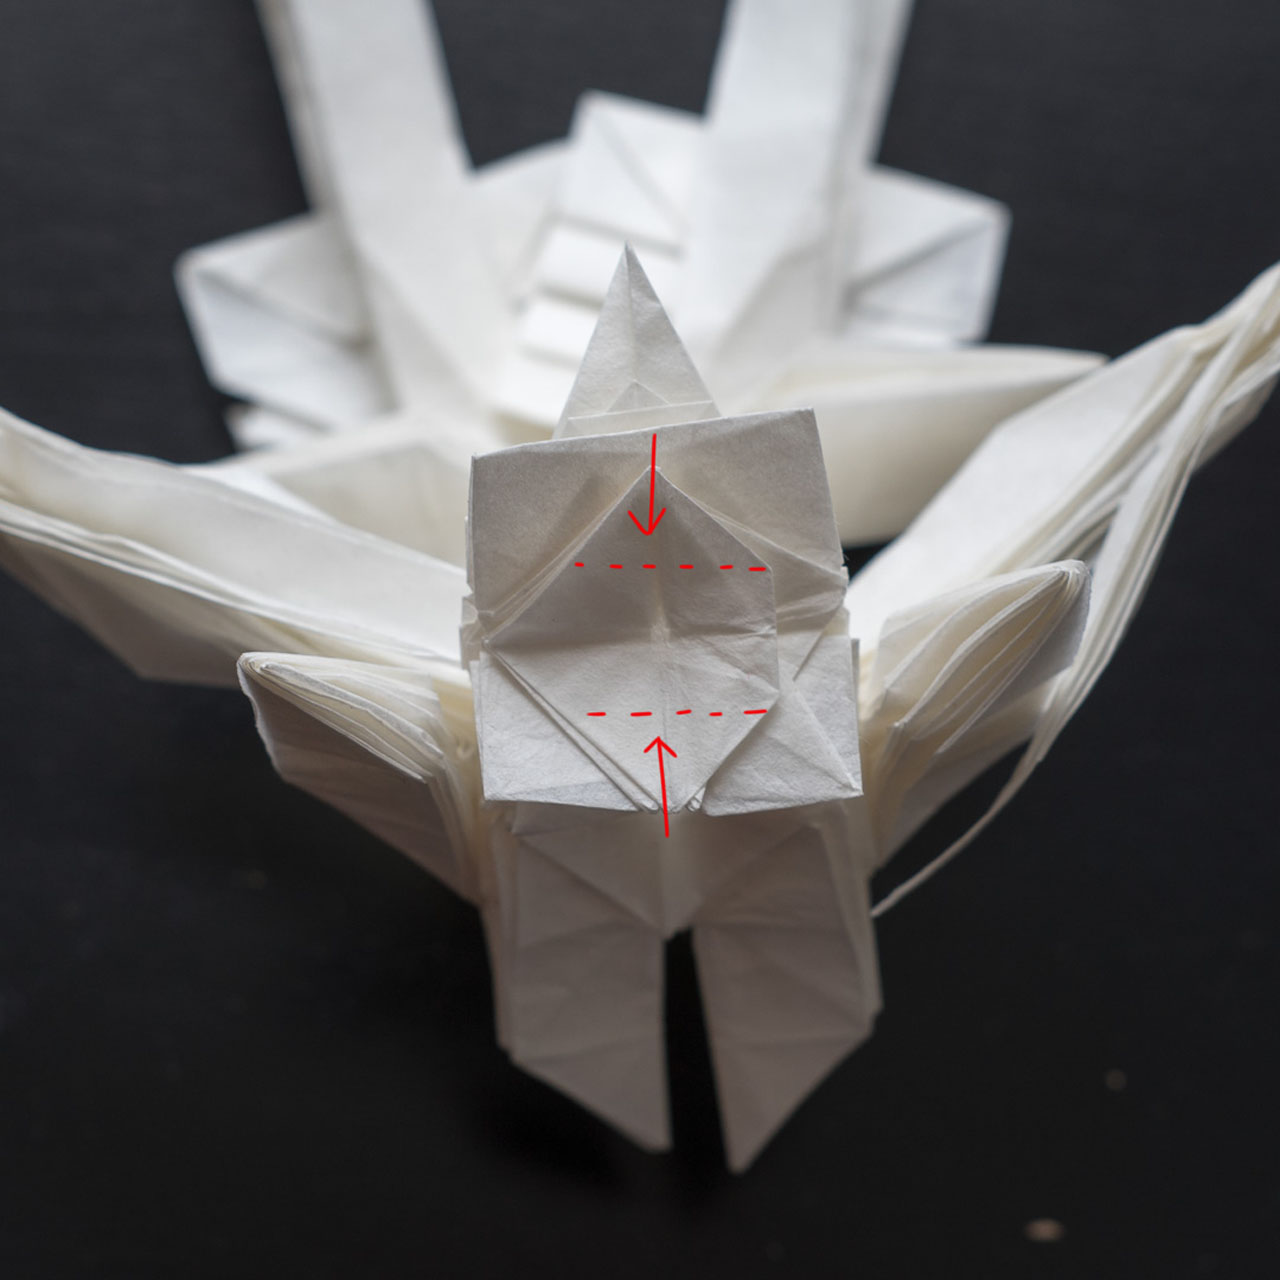
The center part of the chest can be folded to be the neck are and the layers under it can be sunken in.
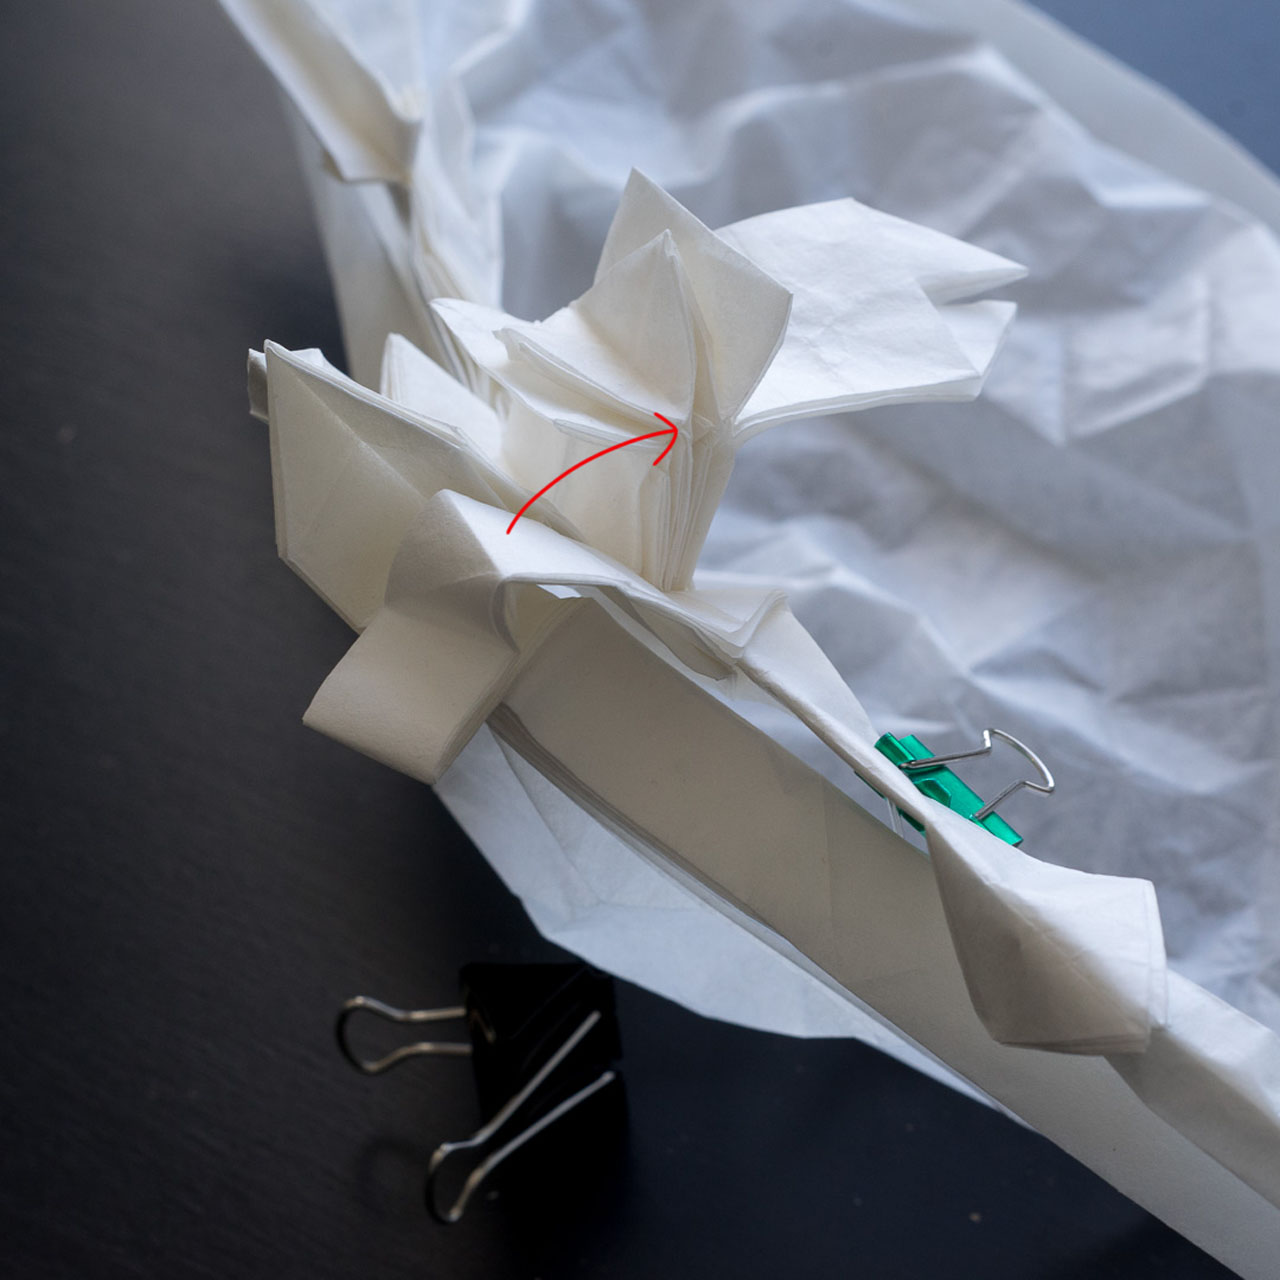
Open the shoulder armor very carefully to prevent ripping. Spread it open and fold it down. You may need to shape the arm before this. Then you can spread the spikes open.
Fold the hand side in the elbow to straighten the arm. While doing this you will get some layer for detailing the clothing.
Sink the fingers and the back of the sword thinner and rearrange the layers to create realistic hand holding a sword. The design is very versatile, you can fold the sword in many different positions. There are 5 flaps for the finger and 2 for the back side of the sword. I used the thinner flap for a strip of clothing coming from the sword.
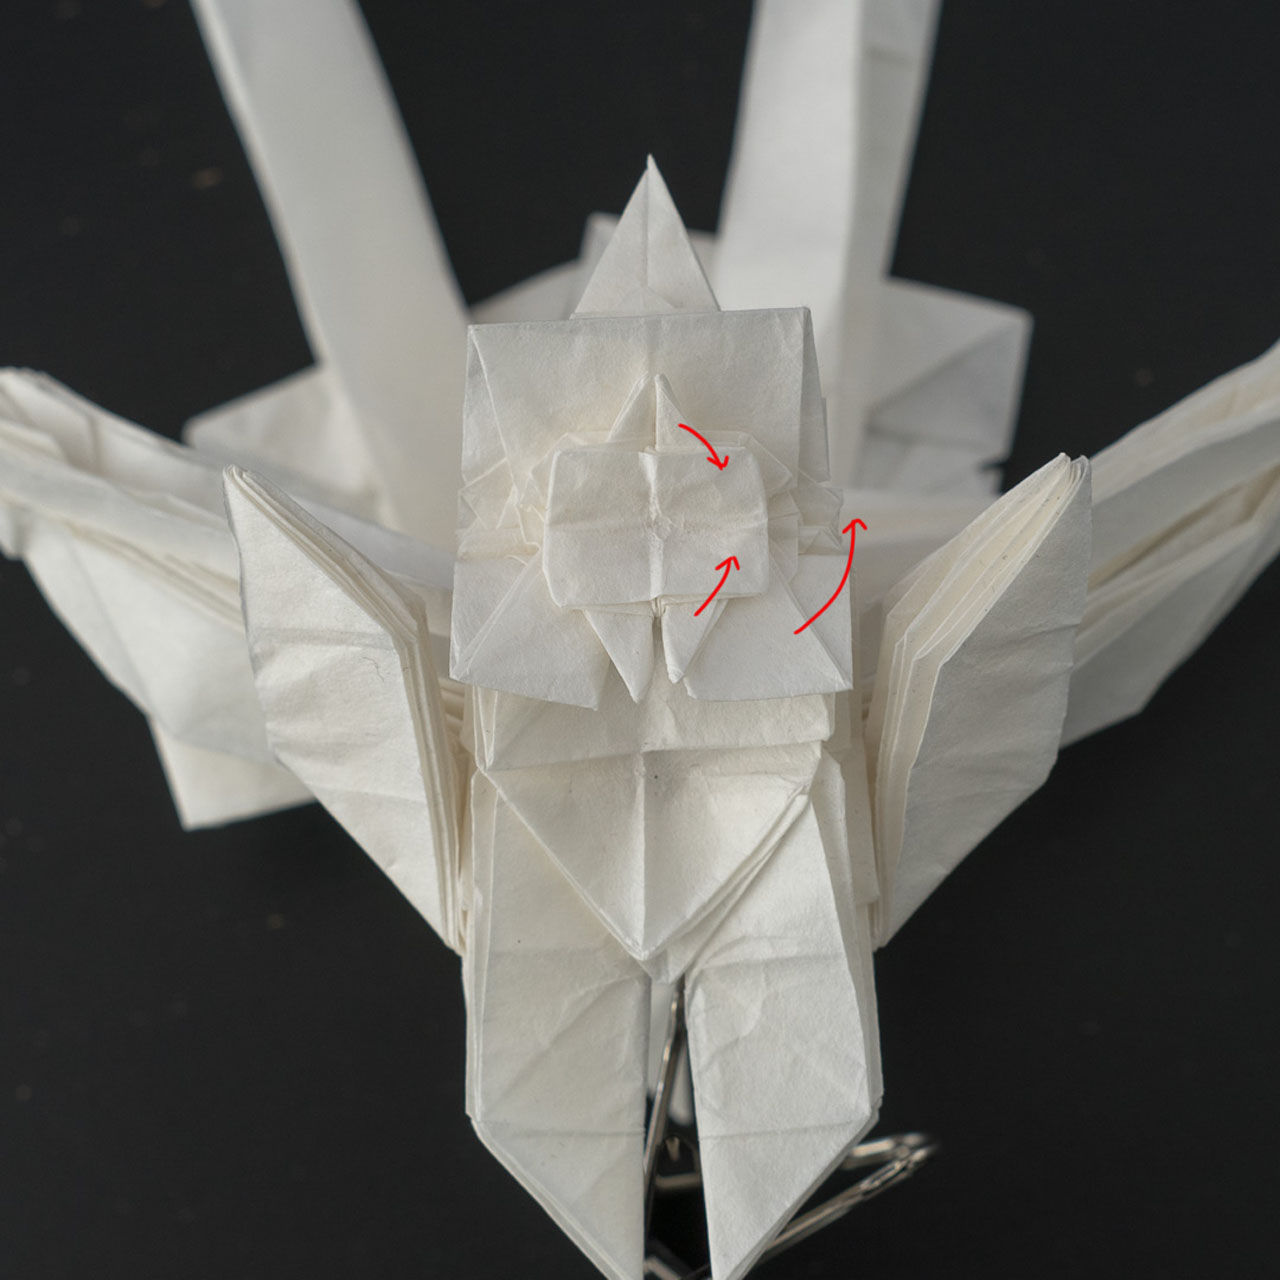
For the head, sink all the four canine teeth to be sharper. You don’t need to sink the visible top layer. Fold the top layer over.
Folding the details for the head
As you folded the top layer over, fold the tip close to the center and then you can fold it back in.
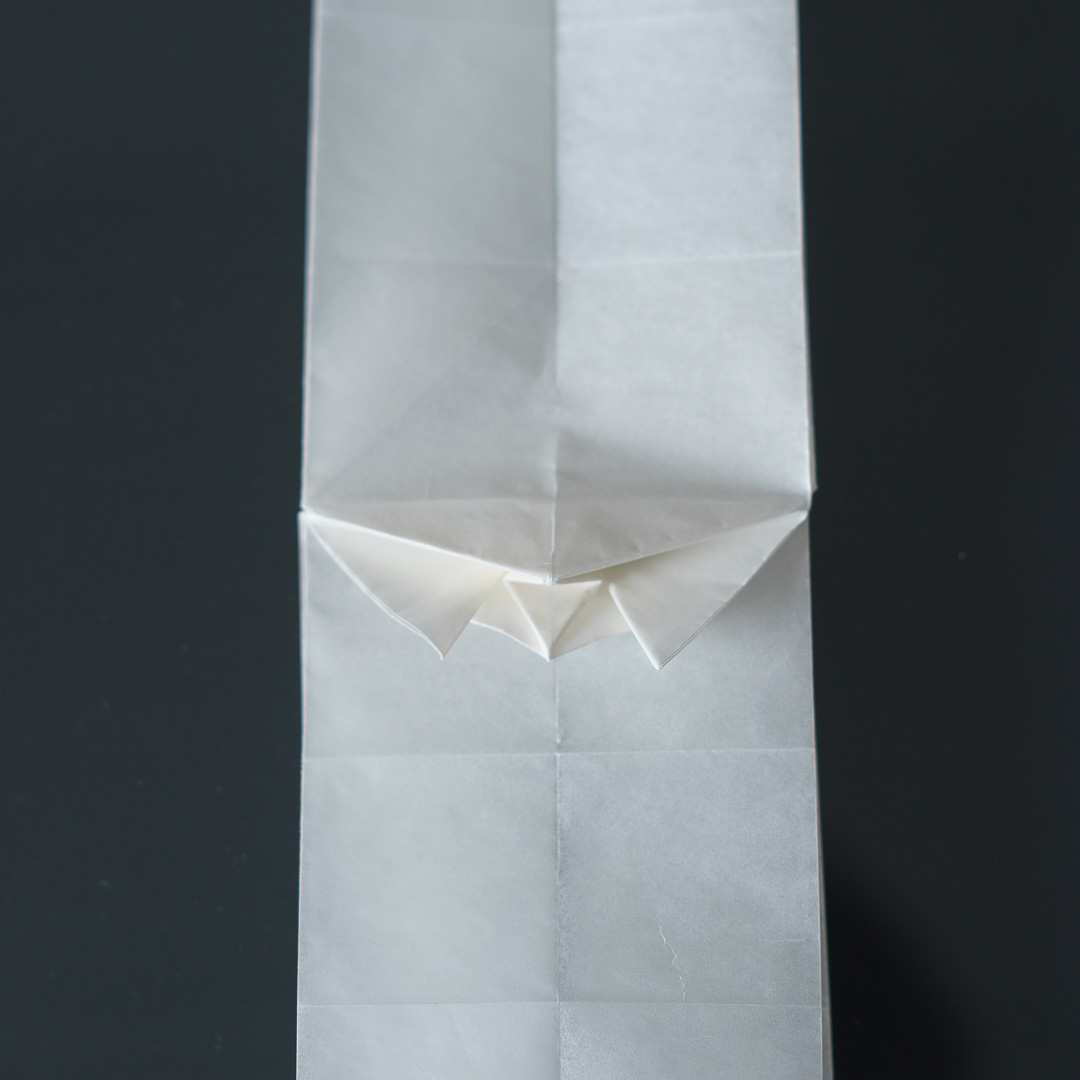
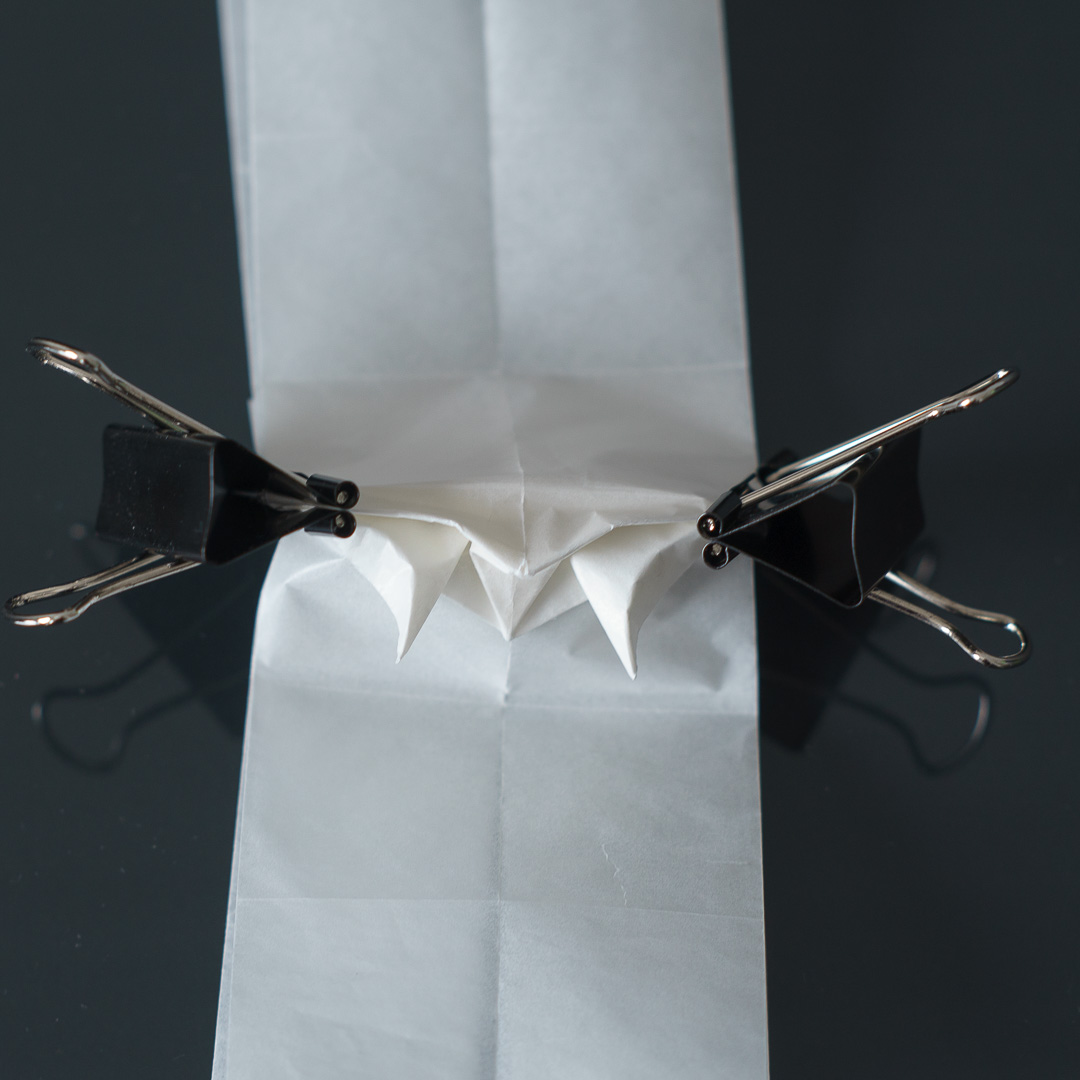
The result should look like this, do it for the other side too. Now sink the center spikes in to reveal the teeth. You can either sink it half way in or two thirds. I would recommend to sink the lower part more in to prevent from creating too large jaw.
This is how the teeth look at this point, now you can widen them up and fold them in to form the teeth. There are the extra flaps on the sides, open them to the sides, so you can fold them in to create cleaner cheeks. I used many of the flaps to hide all of the less aesthetic folds and layers forming the mouth.
I forgot to document the creation of the eyes, but I redid it on a different sheet. On the flap for the eyes, fold these precreases.
Fold them accordingly to form all the necessary parts.
To shape the extra teeth, use round folds on the edges to from them. Then open the layer on top of them to create the eyes. This part probably requires some wet shaping to achieve good results.
The rest of the work is pretty much just shaping, there are few parts I didn’t go through in more detail. This is the end result.
hey um just a question iv’e been wanting to fold this model for a while now but i don’t exactly know how to lay down the creases so if you have a coloured version of the crease pattern that would be great but if you don’t that’s okay.
Just updated the MV version of the crease pattern. Also updated the layout for better clarity.
omg thank you
This is so impressive. The mind you must have to make something as intricate, using such a limiting technique! I am in total awe of your work :0
Very inspiring for my 11 year old son who is fascinated and continuously folding origami- thank you
Masterful… ❤
Astonishing control of the sheet, congratulations
Thank you!
This is just wow! Coming from 9Gag and bravo!
Tuleeko töihisi mitään suoja-ainetta jotta että todella upeat taideteoksesi säilyisivät sen vähintään sata vuotta?
Niissä ei vielä ole mitään suoja-ainetta, mutta huolellinen käsittely ja oikeanlainen säilytys antaa niille pitkän iän. Sellaista kuitenkin etsin parhaillaan.
MINDBLOWING !
dude that’s some amazing talent! keep going – a guy from Korea
Thank you!
Coming here from 9GAG, some dude posted your work. This is incredible!
Hi Juho
This is incredible. Could you please share videos of folding the origami models? The description here in text is definitely helpful but I guess video will make it easier to understand.
Holy shit. That’s incredible
Thank you!