
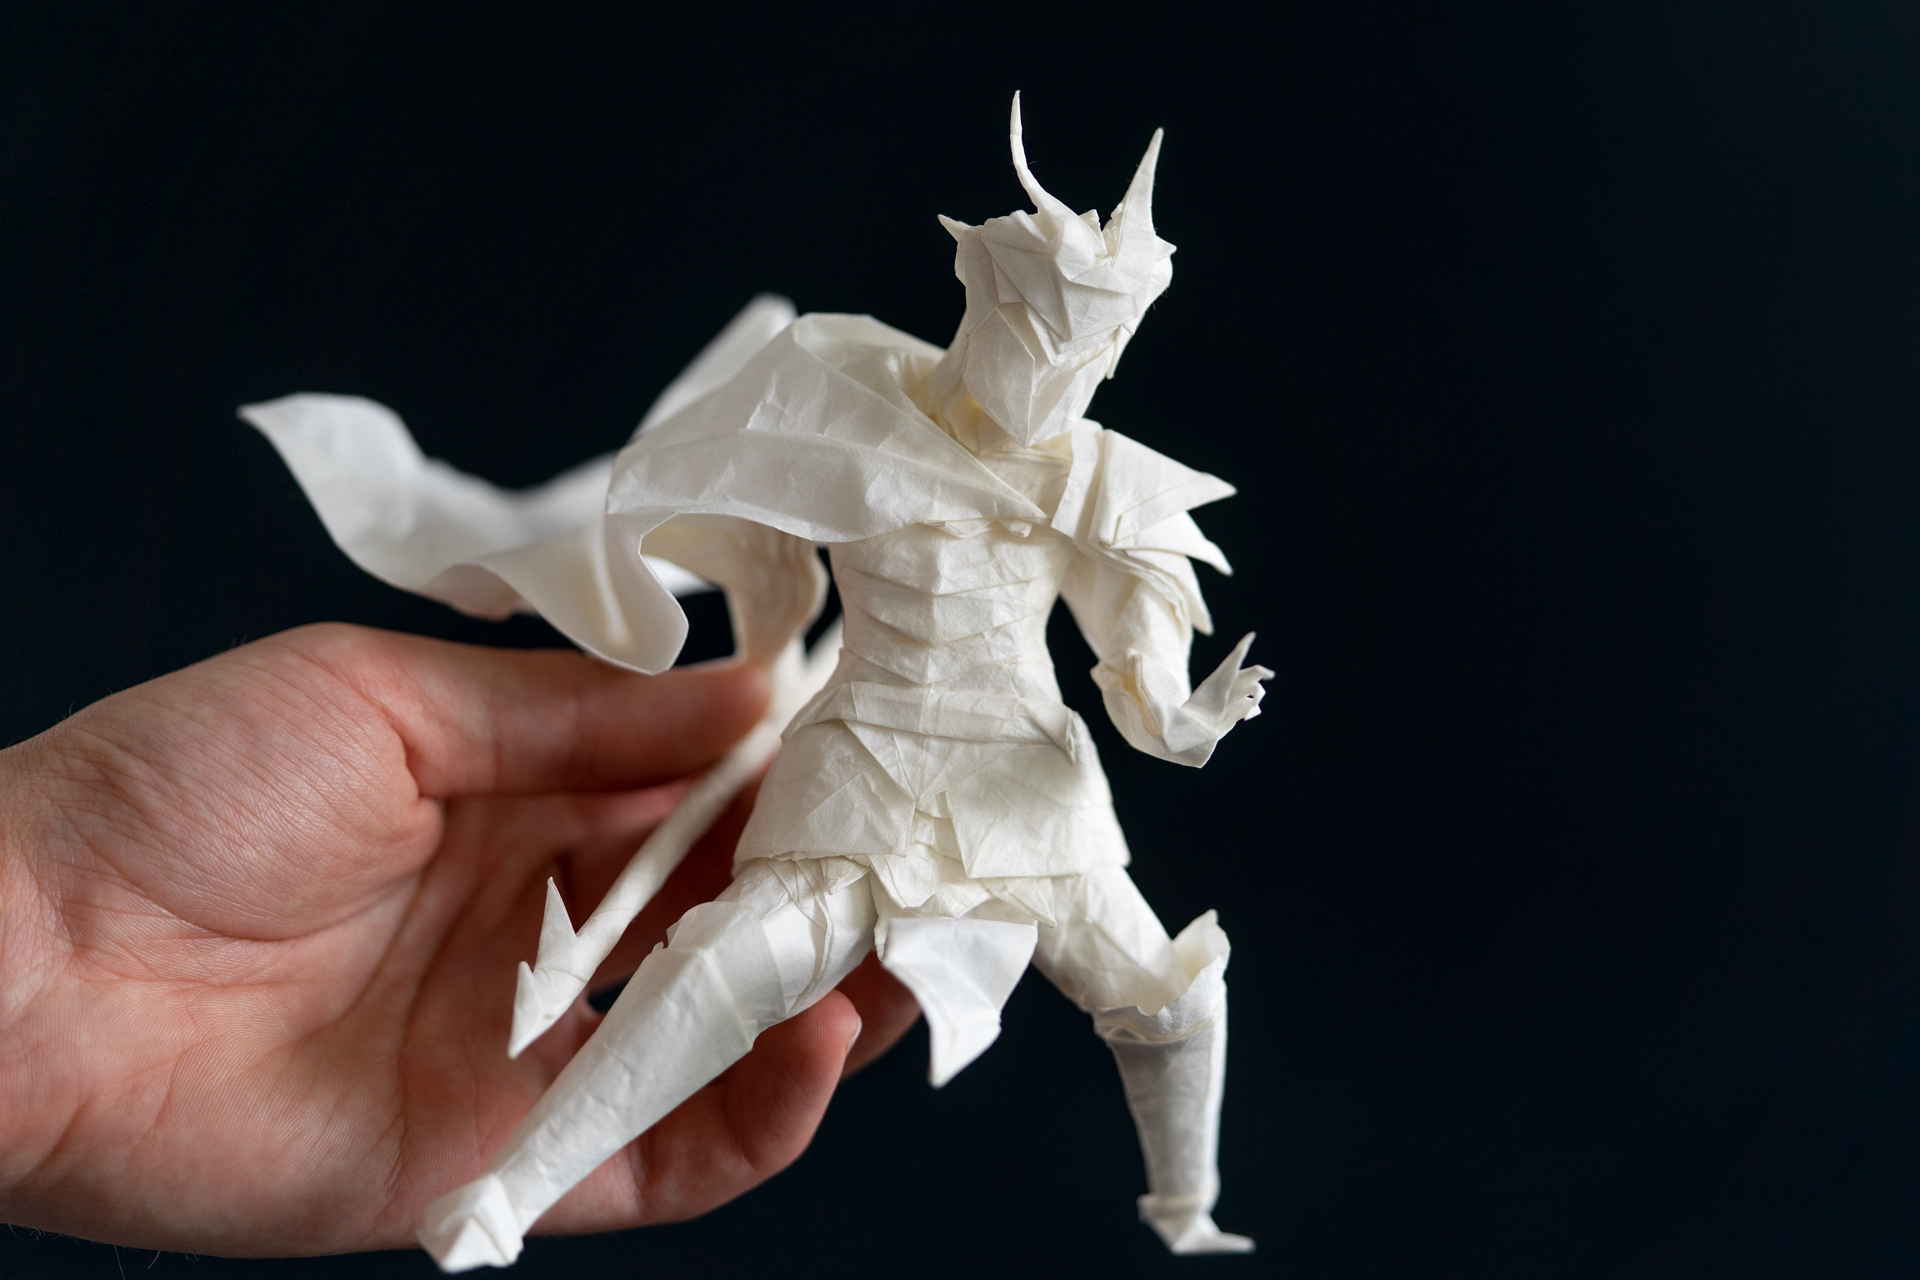
This article will be showcasing some of the design process involved in creating the Spearman. The figure was designed roughly in one weekend, which is fast compared to my other designs that can take several months to plan.
I try to keep the explaining simple, so a person without prior knowledge of complex origami can get a glimpse of the thought process behind these kind of creations. This is just the tip of the iceberg of the whole concept of what kind of things are taken into account when designing complex origami. If you are interested in learning more of origami designing, the second edition of Origami Design Secrets by Robert J. Lang is a good source to start.
brief basics of origami design
Before I jump into showing the design process, some understanding of the basics will be helpful to get a rough idea of how this works. Skip this section if you want to keep the reading experience brief and want to see the design process.
There are many rules and concepts that need to be taken into account while designing, but explaining all of them would make this quite long and tiresome article. I will introduce the idea of how circles and/or different polygons are used to represent a figure on a sheet of paper. I think this is one of the most fundamental concepts that is necessary to understand in origami designing.
Lets take a much simpler example, such as a bird to see how it works.

Many of you have probably seen the crease pattern of this model (or the traditional version of it), but instead of just folding it, lets try to think the creation process backwards, how we would turn that bird into a pattern of folds on a sheet of paper.
In the picture above, you can see the bird has 4 long features: the wings, tail, and the head. It also has one short feature, the triangular back. Lets try to illustrate the figure by drawing 4 large circles and one smaller on a square, but with two rules: The circles must not overlap, and the circles can go off the square, but their center points must be inside of it.
Here is one example on how to do it, they could be arranged differently and it would create different results:
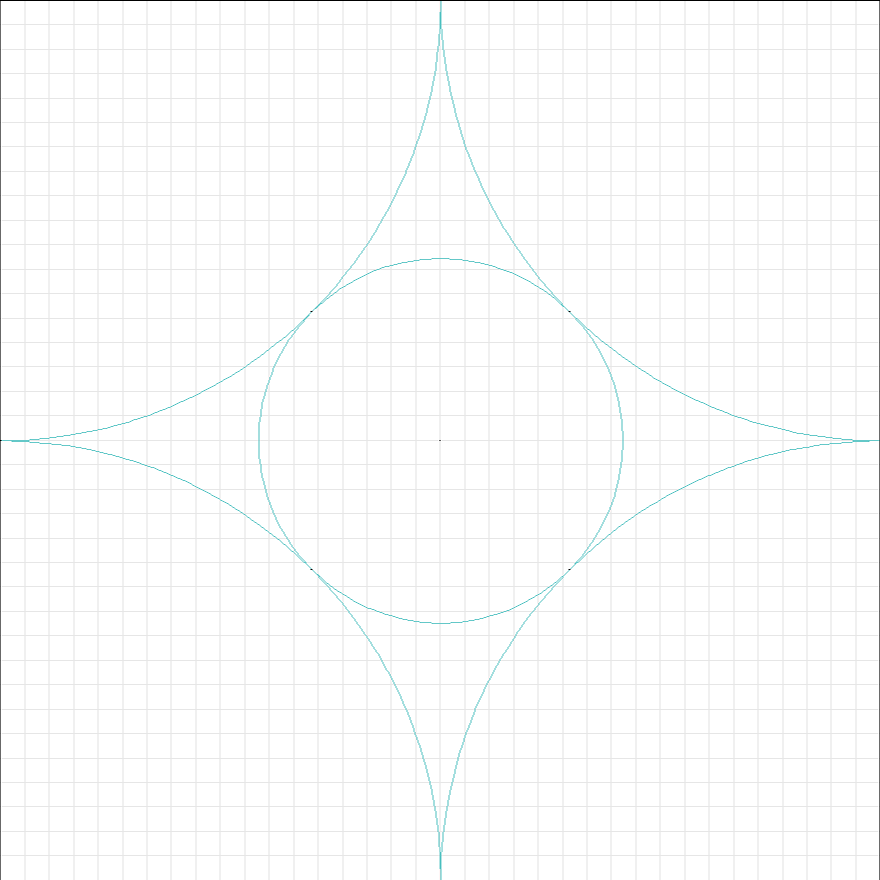
Now to understand why on earth are we drawing circles instead of making folds, circles can be used to simplify the features of the model. They mark the position of the features and show how much a certain feature takes paper on the sheet, while also illustrating how large they are in relation to each other. Circles also show the minimum amount of paper that is required to fold a feature for its length, which is good to keep in mind when creating efficient origami designs. There is more theory to the connection between origami flaps and circles, but lets try to keep things simple.
The center points of the large circles are at the corners, and you can see that there is only one quarter of them visible on the square area. The smaller circle is a full circle, because all of it is inside the square. If we tried to put the large circles somewhere in the middle of the paper, they would have to be smaller, and there would be larger area than quarter of the circles visible.
So in general it is good idea to put large features on the corners, because then they have the least amount of their area visible – which means they take less paper for their size. If I drew same sized circle in the middle, I could fit only one of them on the square area. Now lets draw some folds to see how it becomes into a crease pattern. I won’t be explaining this process, since it will get really complex with the human figure.
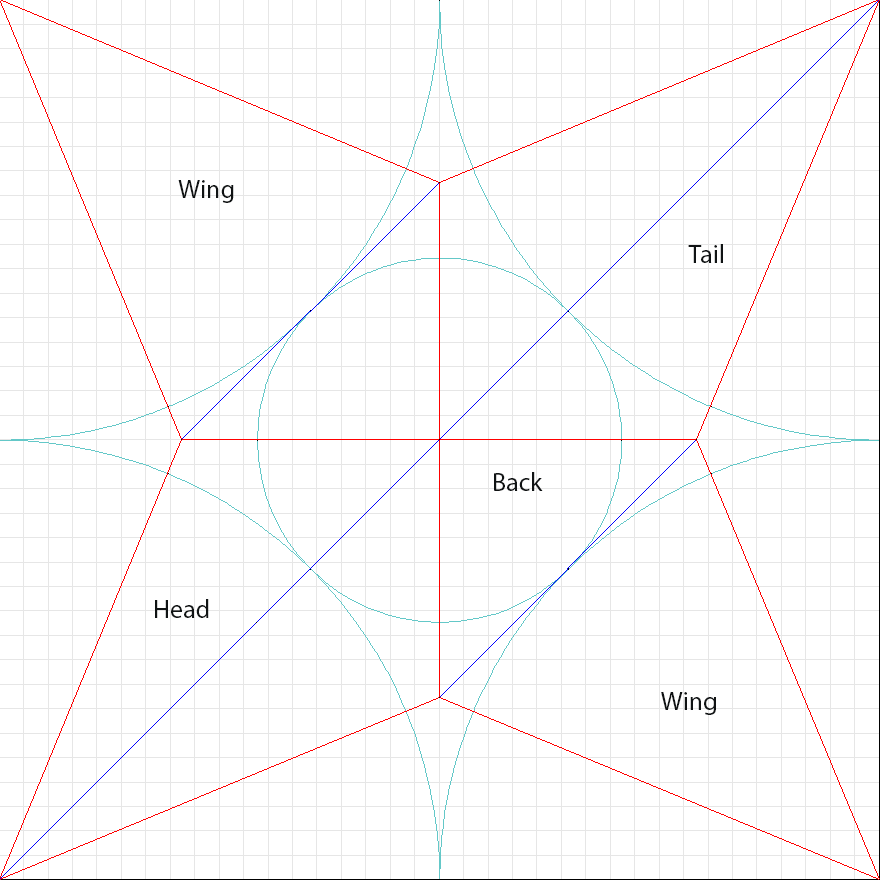
After adding some folds to connect the circles, the result looks familiar, it is the bird base. The bird can be created by folding the pattern and then manipulating the features to make the beak, tail and the wings. The red lines are mountain folds and the blue lines valley folds.
The circles can also presented as different polygons, such as rectangles, octagons, and even hexagons. The different polygons can be used to represent the features in different designing methods. For example a rectangle can be used in box pleating (the design method I will be using soon), or an octagon can be used for 22.5 degree design.
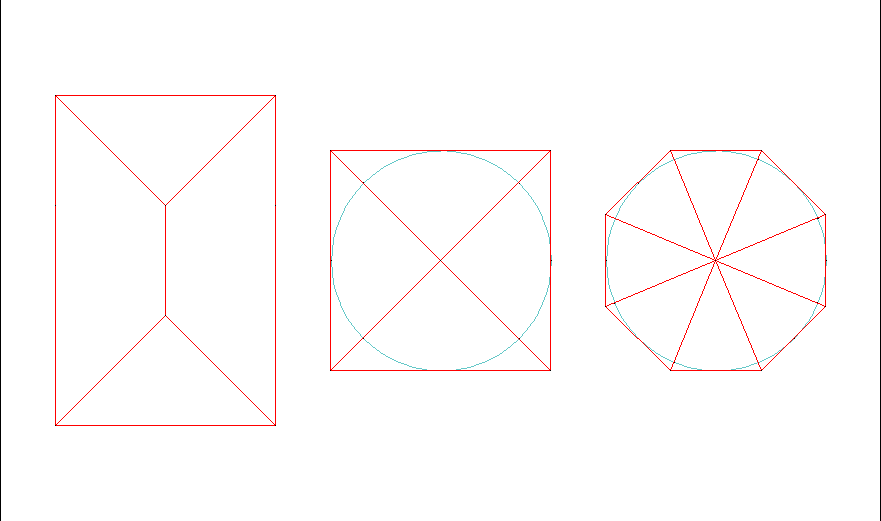
The polygons are iterations of the circle, the closer it is the circle, the more efficient it is. It is good to note that using a polygon with high number of edges comes with a drawback, it will require a lot of folds to create it, and the resulting patterns will become more complex. I can make the crease pattern more than enough complex with just these.
Now we have seen how a circle, or a polygon can represent a feature on a sheet of paper and illustrate how much space it takes. What would a complex human figure look when presenting it as circles?
Developing the idea
Firstly we need to have some idea to design. In my design process, I rarely create any sketches to see how the figures look like, I let them live their lives and change appearance during the creation process. It is more interesting to see something unexpected rather than just seeing the plan take form.
For this figure I decided to have more artistic freedom and not use references as much. Two of my inspirations were the previous pieces, the Spear Warrior and the Assassin. I wasn’t very satisfied with the Spear Warrior and I wanted to create a similar character, but with the style of the assassin. The Spear Warrior was based on 40 grid, this time I wanted to see if I could improve it by using smaller 36 grid.
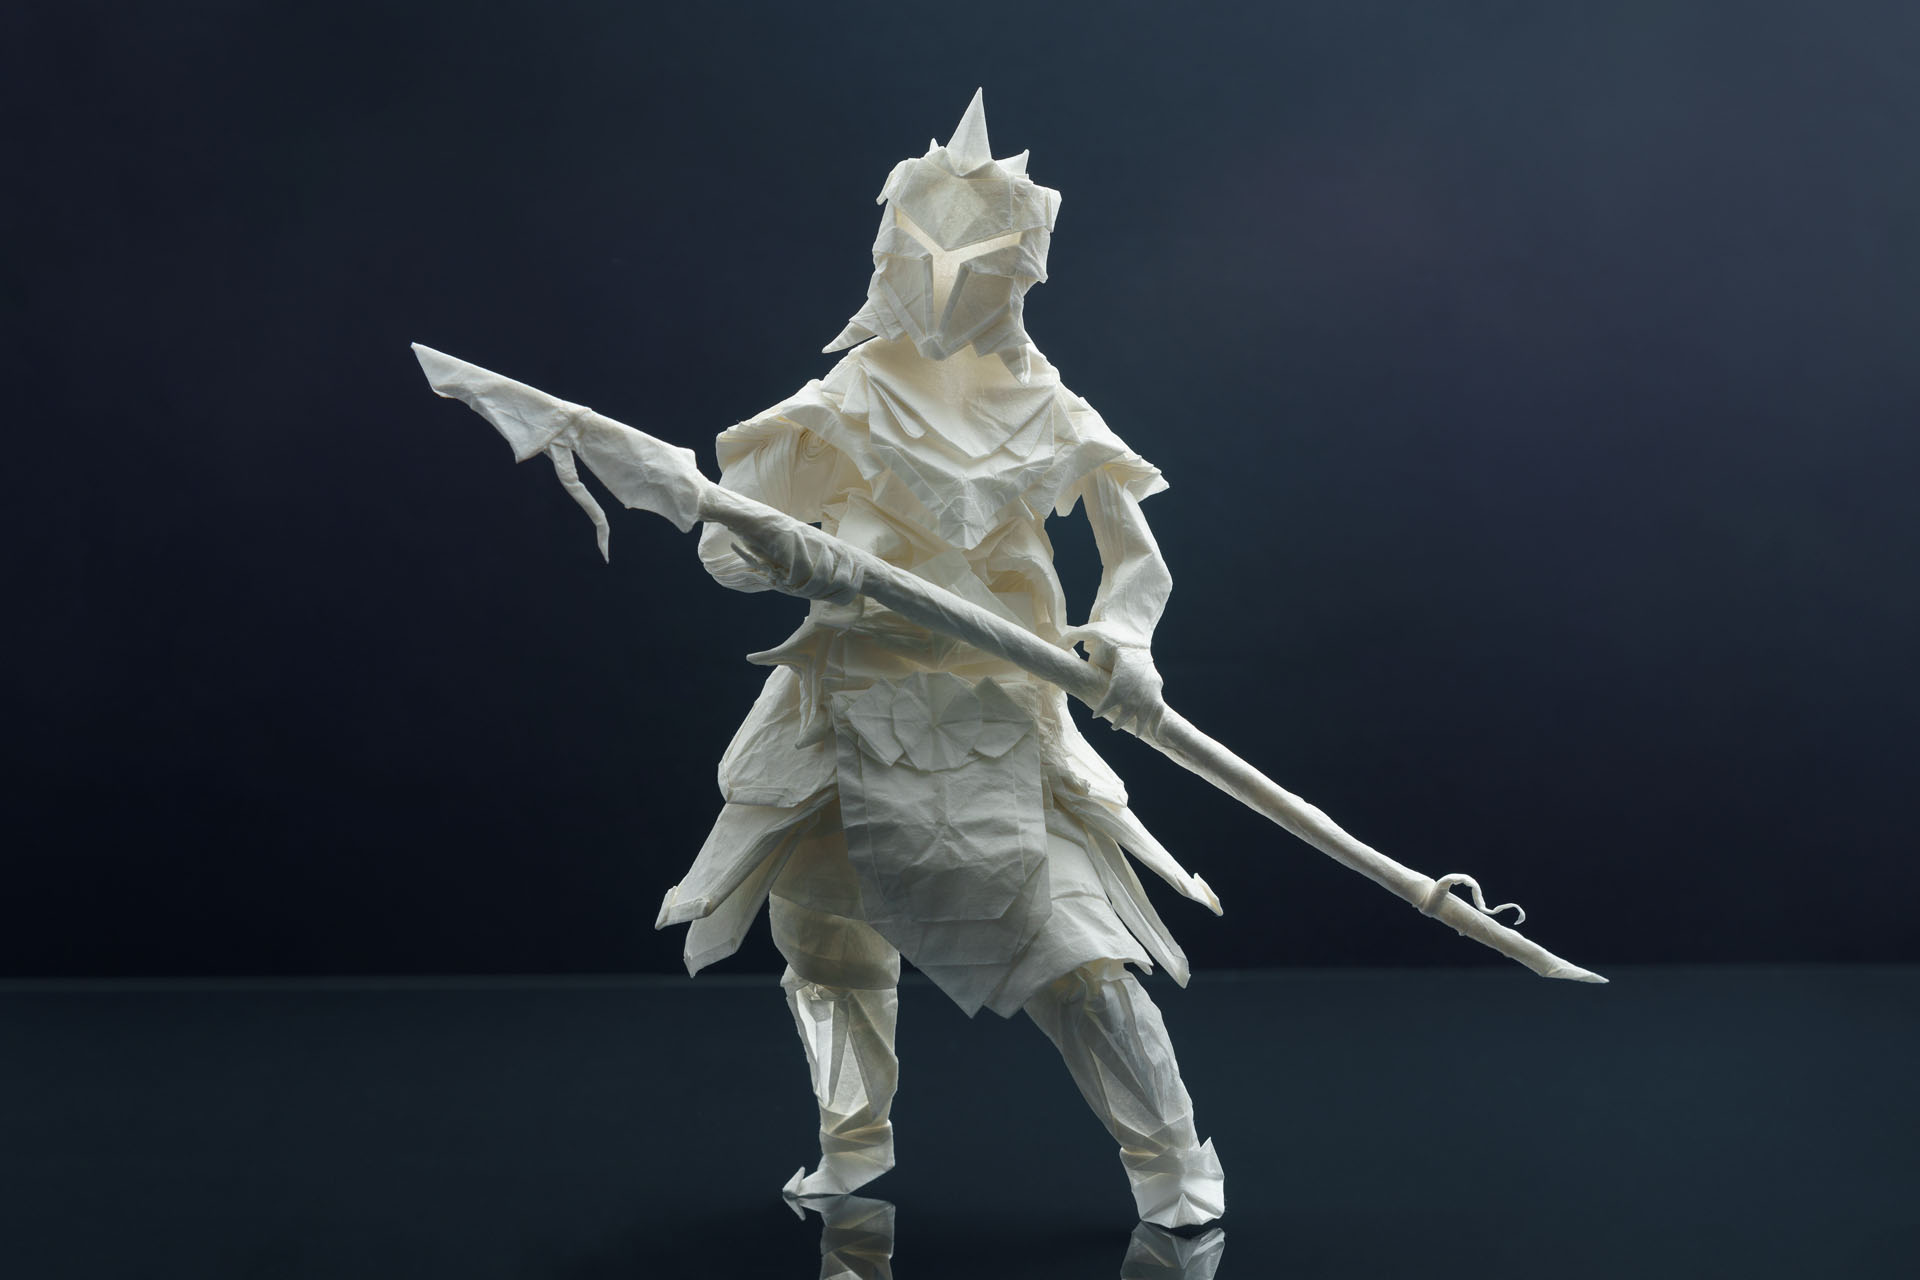

This time I wanted to make the spearman more lifelike and make it have a cape, while making the design more efficient. The main visual features of the character would be the long spear, stylized body armor, having the cape on the one shoulder and balance it with some shoulder armor on the other. I initially planned to create the figure with a human face, but that had a surprising change in the folding process.
Trying to figure straight out how a character like that could be represented as folds on paper would be a challenge on its own, so it is better to simplify the idea to have a good starting point for more efficient design. In figures like these, the efficiency is crucial, since all the excess paper will either create undesired features and details, or unnecessary thickness on otherwise thin parts.
Planning the design
In its most simple form, the largest features would be the head, cape, arms, spear, and the legs. Lets represent these as circles on paper. Drawing 6 circles on a square shouldn’t be a difficult job, but there are some challenges, such as correct proportions, making the spear come from the hand in a correct way, and making all the armor and clothing come out in a realistic way. The size of the circles will change over time many times, so the size is not too important for now. The parts take roughly the same area each, with the exception of the spear.
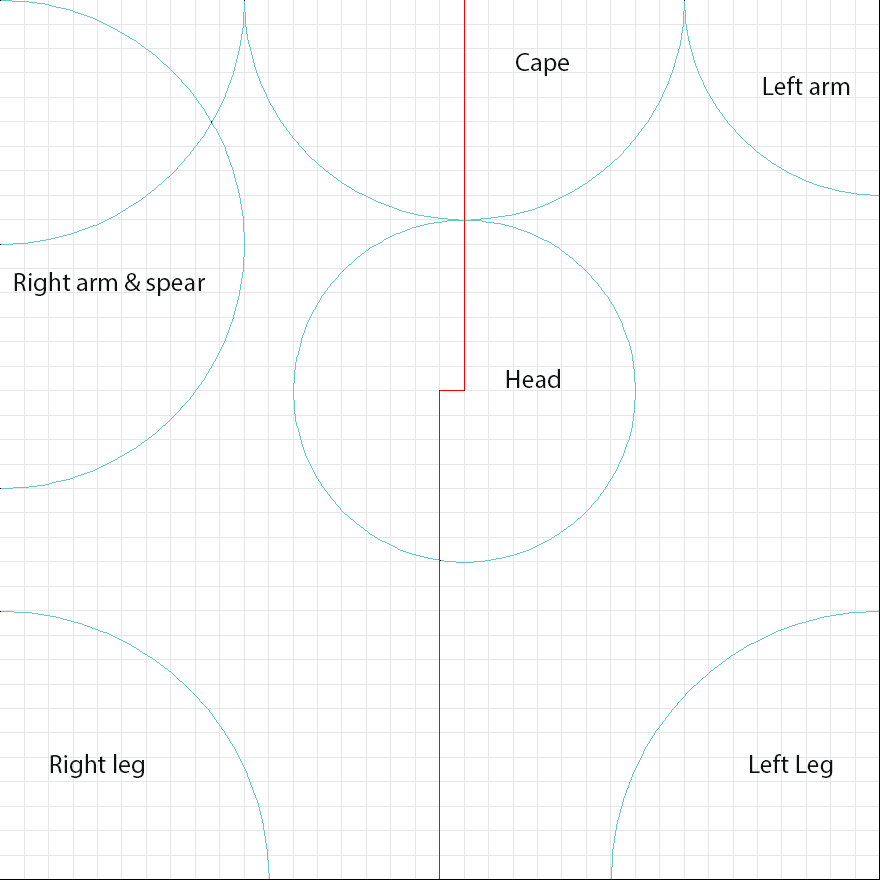
Here is one possible way to illustrate those features with circles. You probably already noticed that I broke one of the before mentioned rules, two circles overlap. It is just my way to illustrate two features that branch from one larger one. In reality the circles would be smaller and not overlap, while there is extra area surrounding them. The center points of the two circles represent the positions of the smaller circles, and their combined area represent the overall area of paper that the spear and arm will need.
The red line represents the rough idea of the symmetry line, it divides the head, cape and body in half, and separates the limbs to the different sides. You might also have noticed that the circles are much smaller than on the crane, and there is a lot of unassigned space. I don’t always try to optimize the sizes of the features at this point, since the design will change a lot when I refine it.
There are two problems: One is that the cape is too small, since it has half a circle by coming from the edge of paper. Also the cape doesn’t have any space to move or enlarge. Second problem is that the head comes from the middle of the paper, meaning that it uses the full circle of paper. I could have moved the cape on the right side and the head on the top, but then the cape would have been disconnected from the head.
Lets try some other arrangement if we can make it more efficient.
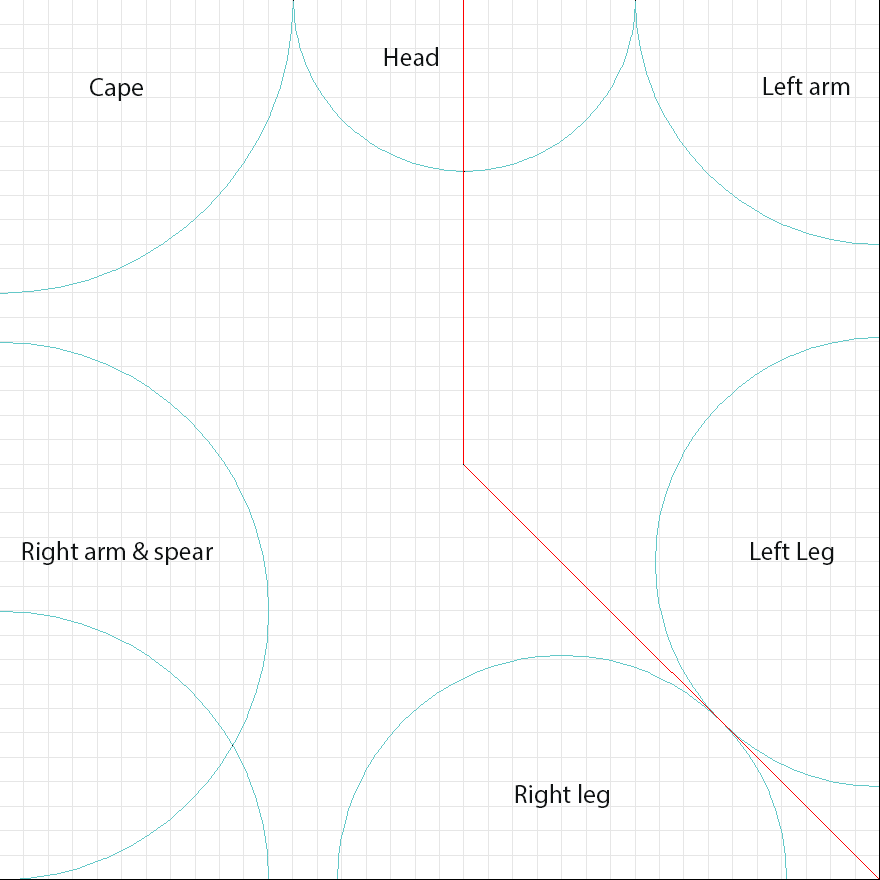
This is more interesting result. This time the symmetry line is not straight-ish, but it bends in the middle. The symmetry line divides more paper on the left side than the right. This helps to get larger amount of paper for the cape and spear, while keeping other features similar or larger size. Now the unused excess paper is all in the middle. We can use that to create all the smaller details for the body armor. You can notice that apart from the cape and spear, the paper is divided quite evenly on the both sides of the symmetry line.
Now I am satisfied with the plan I can start developing the folds and optimizing the design further to make it better.
Designing the structure
Now the actual design process can start. I begin from the legs, because they are for now the most difficult part. The symmetry line flows diagonally, so the leg structure also needs to be diagonal to be symmetrical.
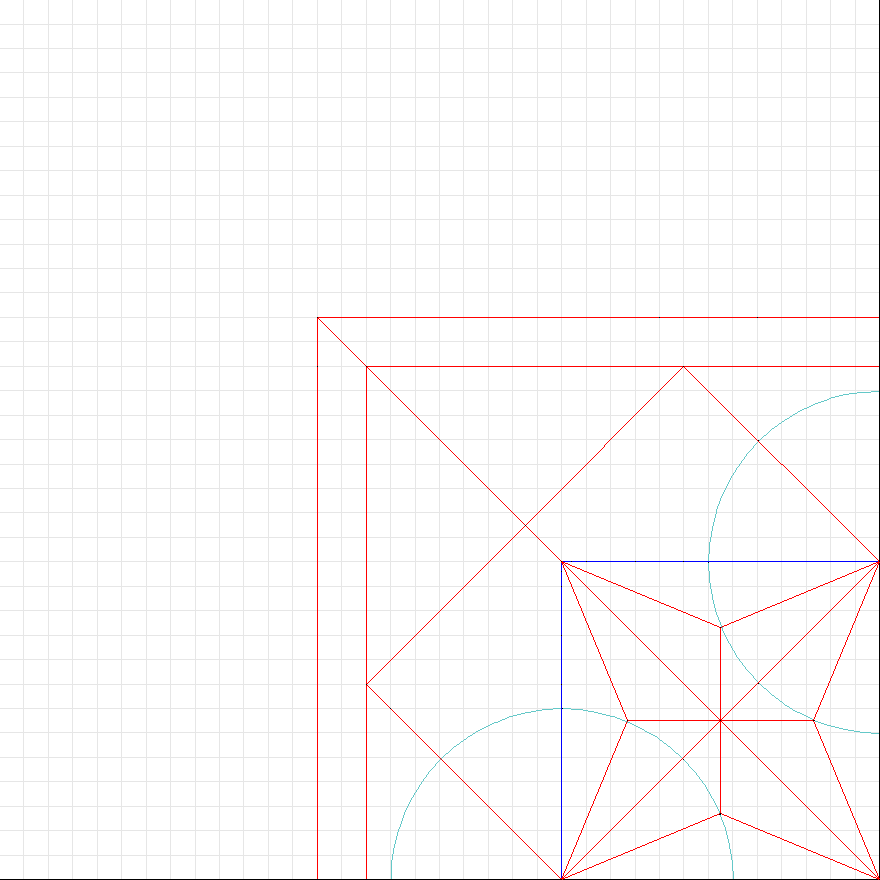
You can also notice how I used the same bird base between the legs, some structures can repeat even in very different designs. The traditional origami bases are one of the fundamental building blocks in origami design.
These types of basic structures are not often used in box pleating, the grid based designing what I am doing here, mostly because they don’t always lie on the grid, which can cause some problems later. In this case it works well since it flows with the symmetry.
There are couple problems though, the legs are not as efficient as they could be, and the large diagonals don’t intersect on the grid. It is usually good to avoid that happening, because it either can restrict the design, or it can create some unwanted grid divisions.
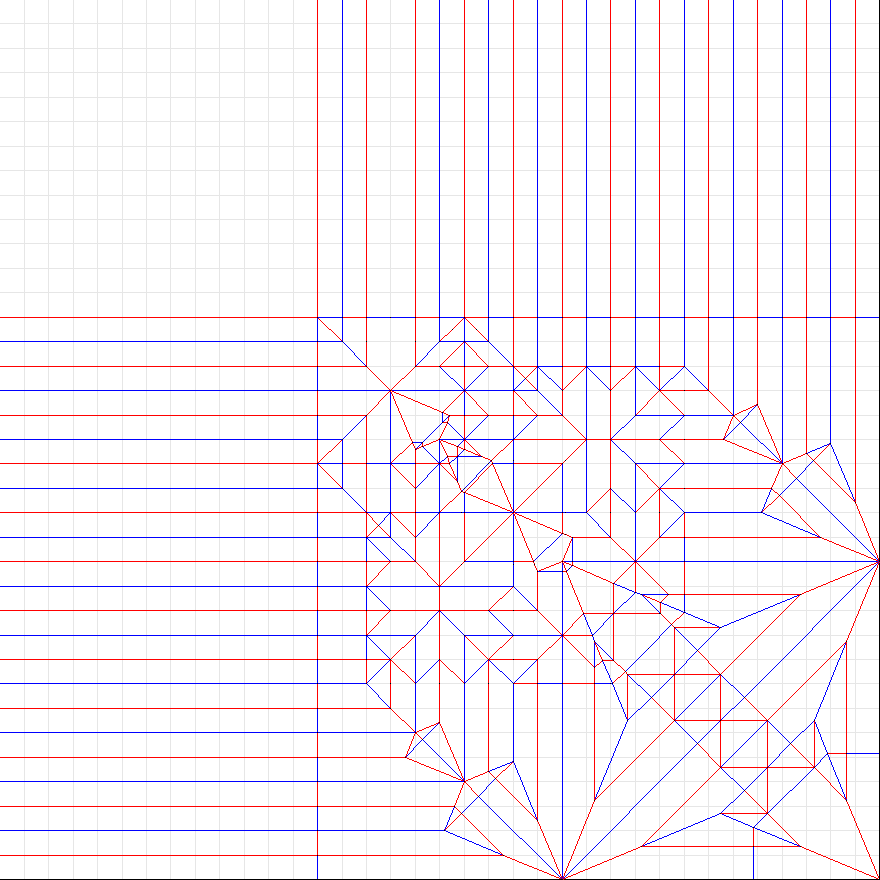
I found a solution to the problems. By creating that complex structure, I have many smaller features that can be used to create the body armor, while preventing from creating the unwanted grid divisions. I also made the legs longer by modifying the bird base. At this point, the structure starts to get quite complex.
Now onto designing the rest of the figure.
Now the crease pattern starts to look more complete, it could be folded into a figure already. While I have been developing this I have also been test folding it on a piece of paper. By folding the model physically while planning it on a crease pattern allows me to achieve both efficient and detailed figures. By only working on crease pattern, you get efficient designs, but it is also very tedious method to do a lot of details. Test folding is not useful to plan efficient designs, but it is easy to develop a lot of details. This way I get best from both of the worlds.
This may look simple how everything lines up and how effortlessly the folds and features come together, but to get to this point, it requires years of practice. In reality you are always battling how to fit everything nicely and how to use the paper in clever ways to make all the detail and get the efficiency, while following all the rules to be able to fold the figure in reality.
This pattern has most of the necessary details, but it lacks on one thing, definition. To make it a better design, we have to make sure all its parts are meaningful to the character and they look what they are supposed to be.
Adding the detail
Starting off from the cape, it was too close to the right arm and it had unappealing 45 degree angles on the top corner. They were fixed with some extra folds. I was also playing around with the ideas what to do with the head to add some extra detail.
Now the crease pattern is finished. The spear is now thinner, has the extra hinge to alter how it comes off from the hand, and it has bit of extra paper moved into the arm. Some of the details have changed in the body armor, the chest has now more definition, and the head structure is finalized.
You can notice that the spear has a lot of dense folds, those are used to make it very thin, however it has a downside to it, it will be difficult to fold from thicker or weaker papers due to the large amount of layers in the spear and the arm. In contrast to the dense folds, the cape is one large polygon without any folds. You’ll see in the folding process that it mostly stays in that shape to the end.
And here is the same pattern without the text for clarity:
Now the design is completed, right? Nope, this only has a small part of all the detail that the final figure has. It doesn’t have any joints, facial details, those small armor pleat details, or any of the curves that the figure has! In fact, folding this pattern constitutes roughly 20% of the whole folding process of the figure.
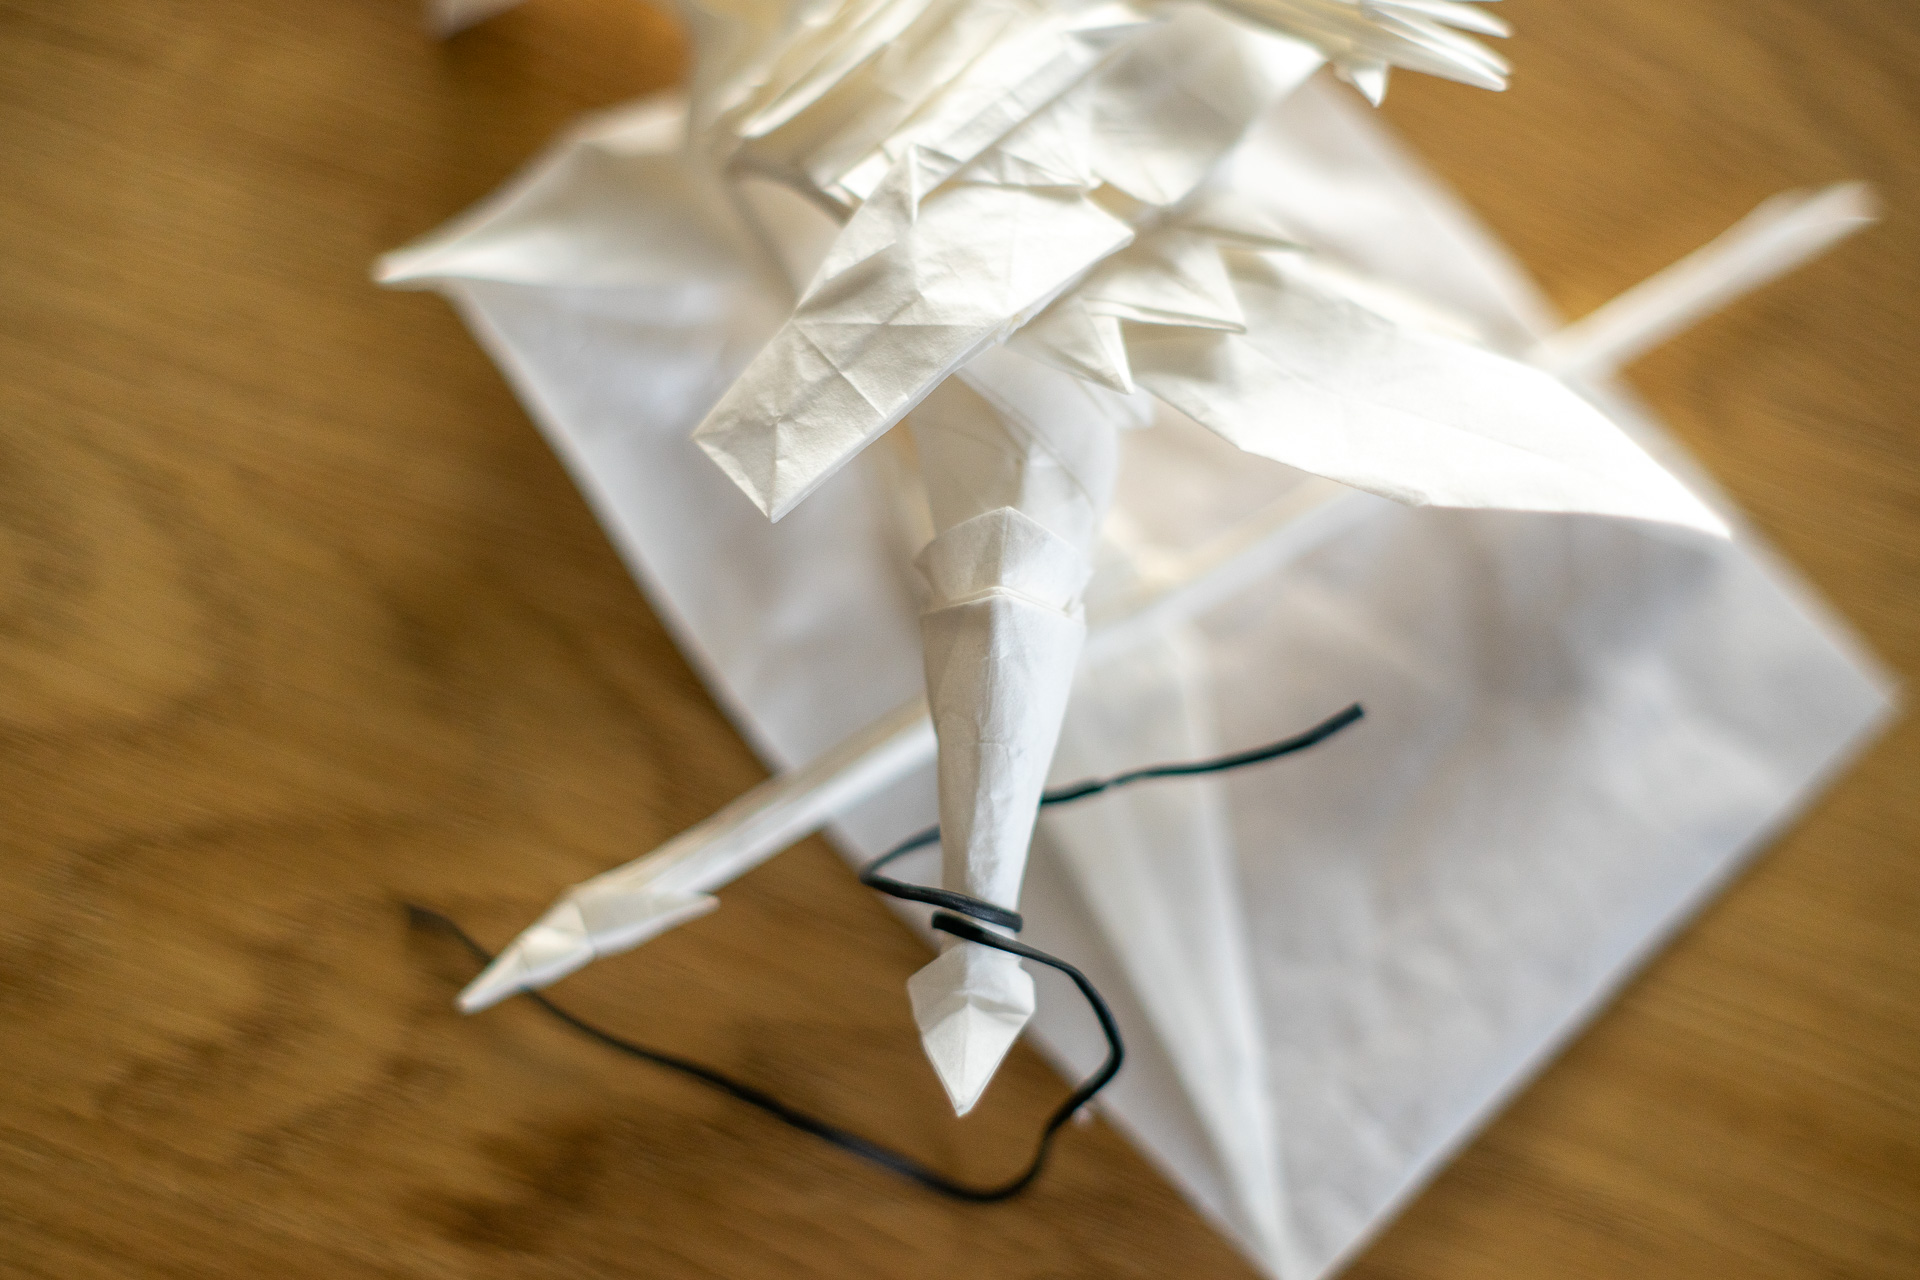
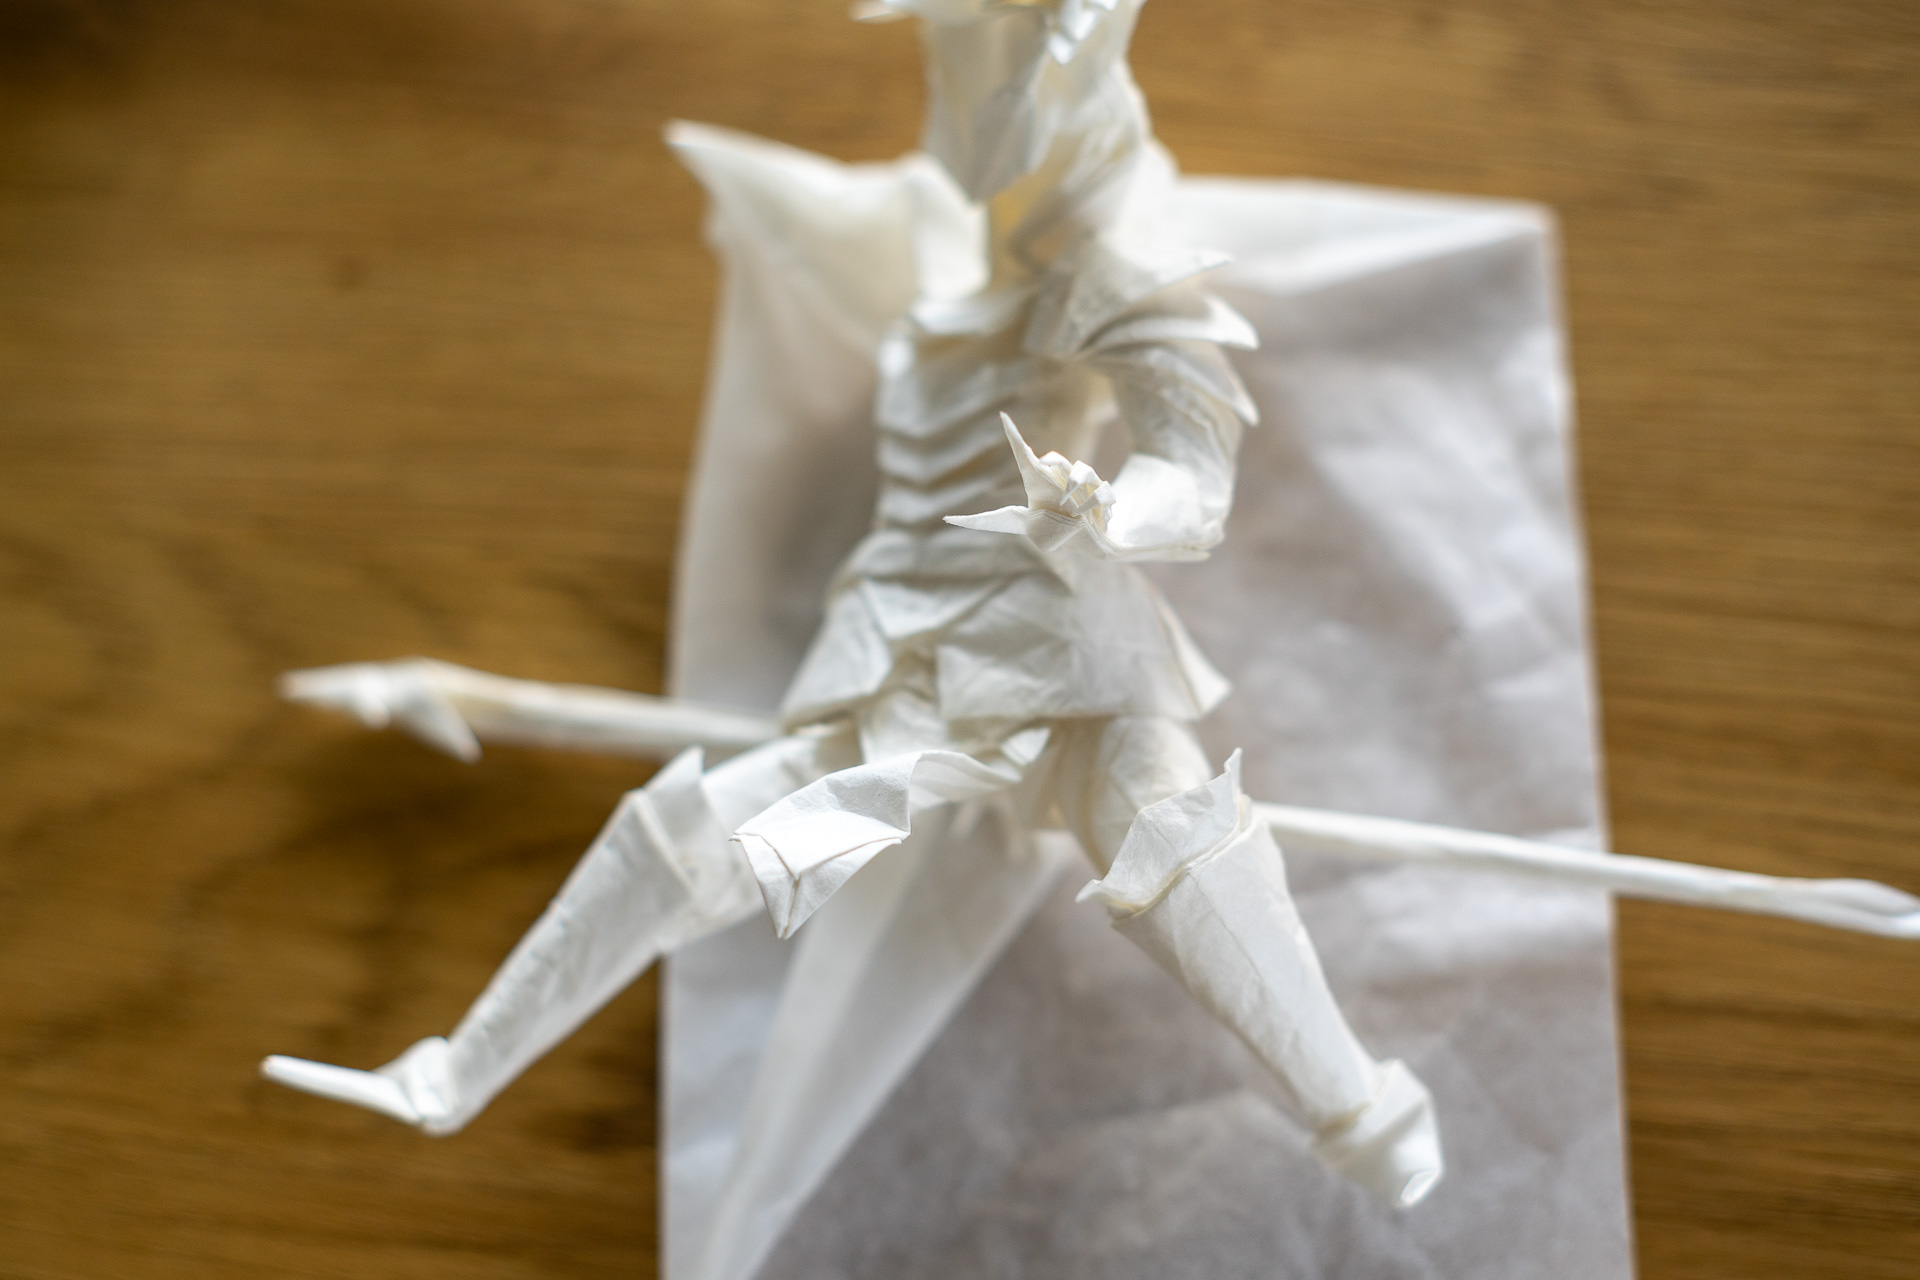
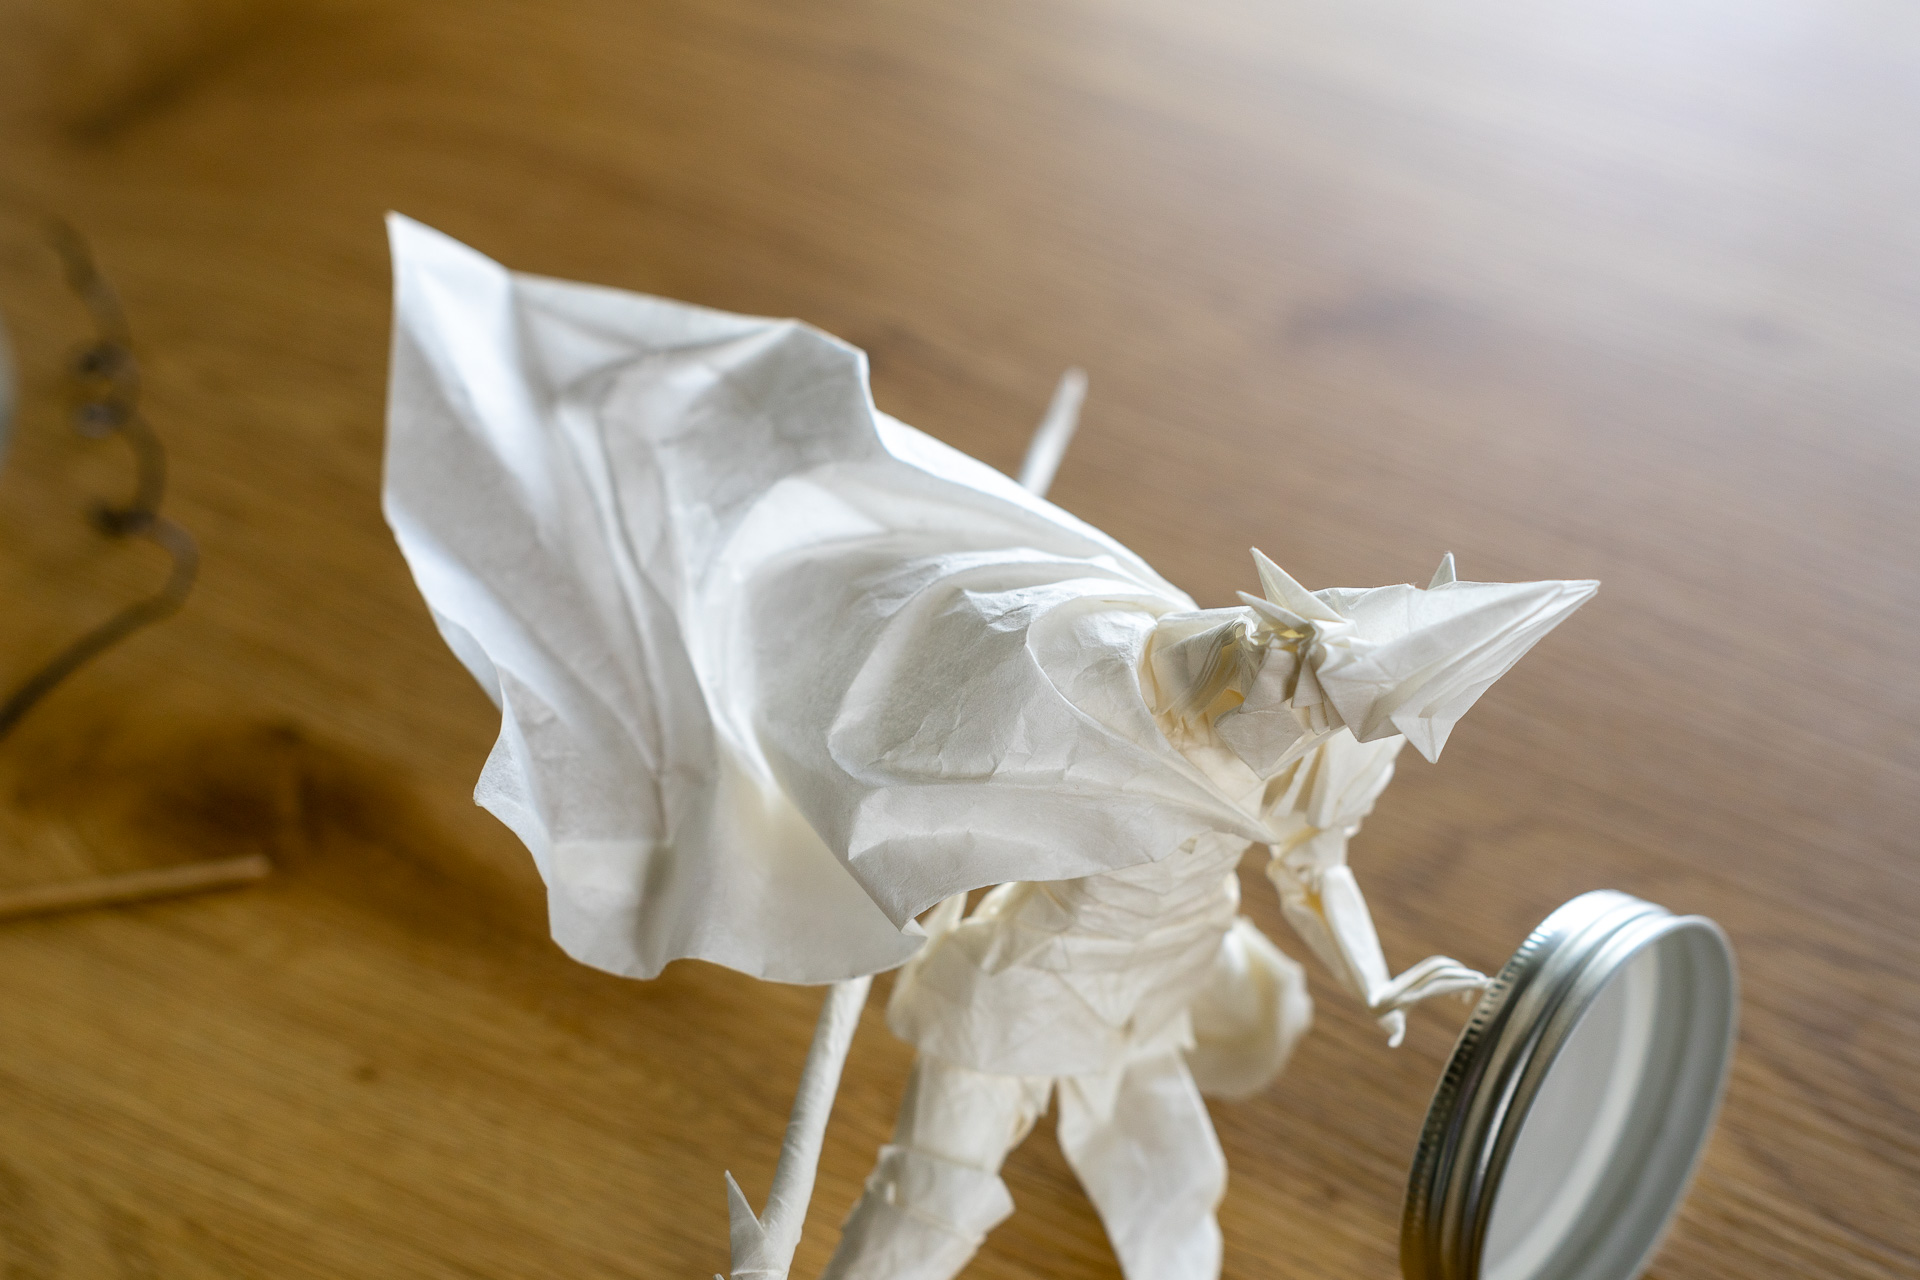
Folding the Spearman
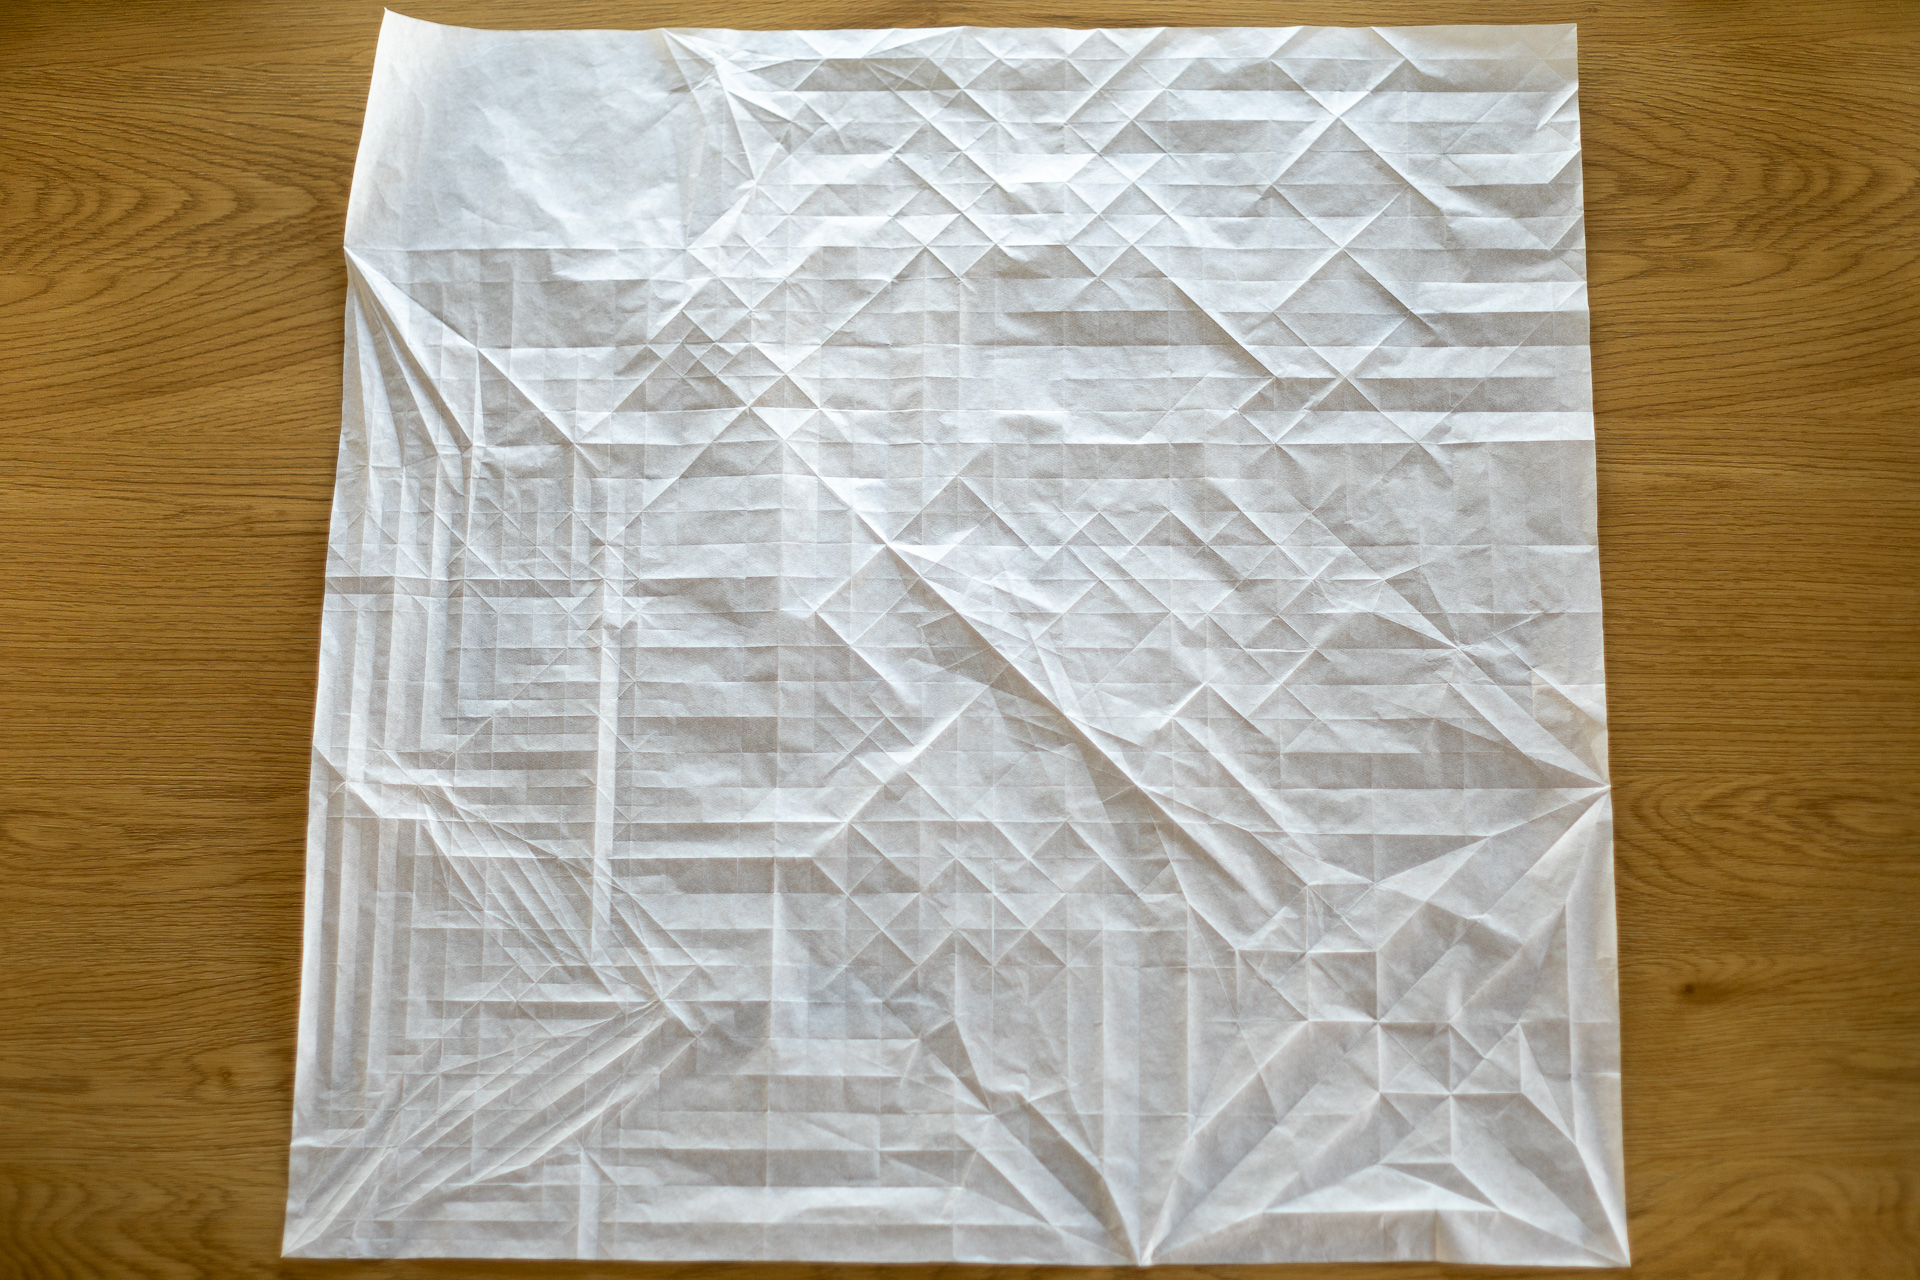
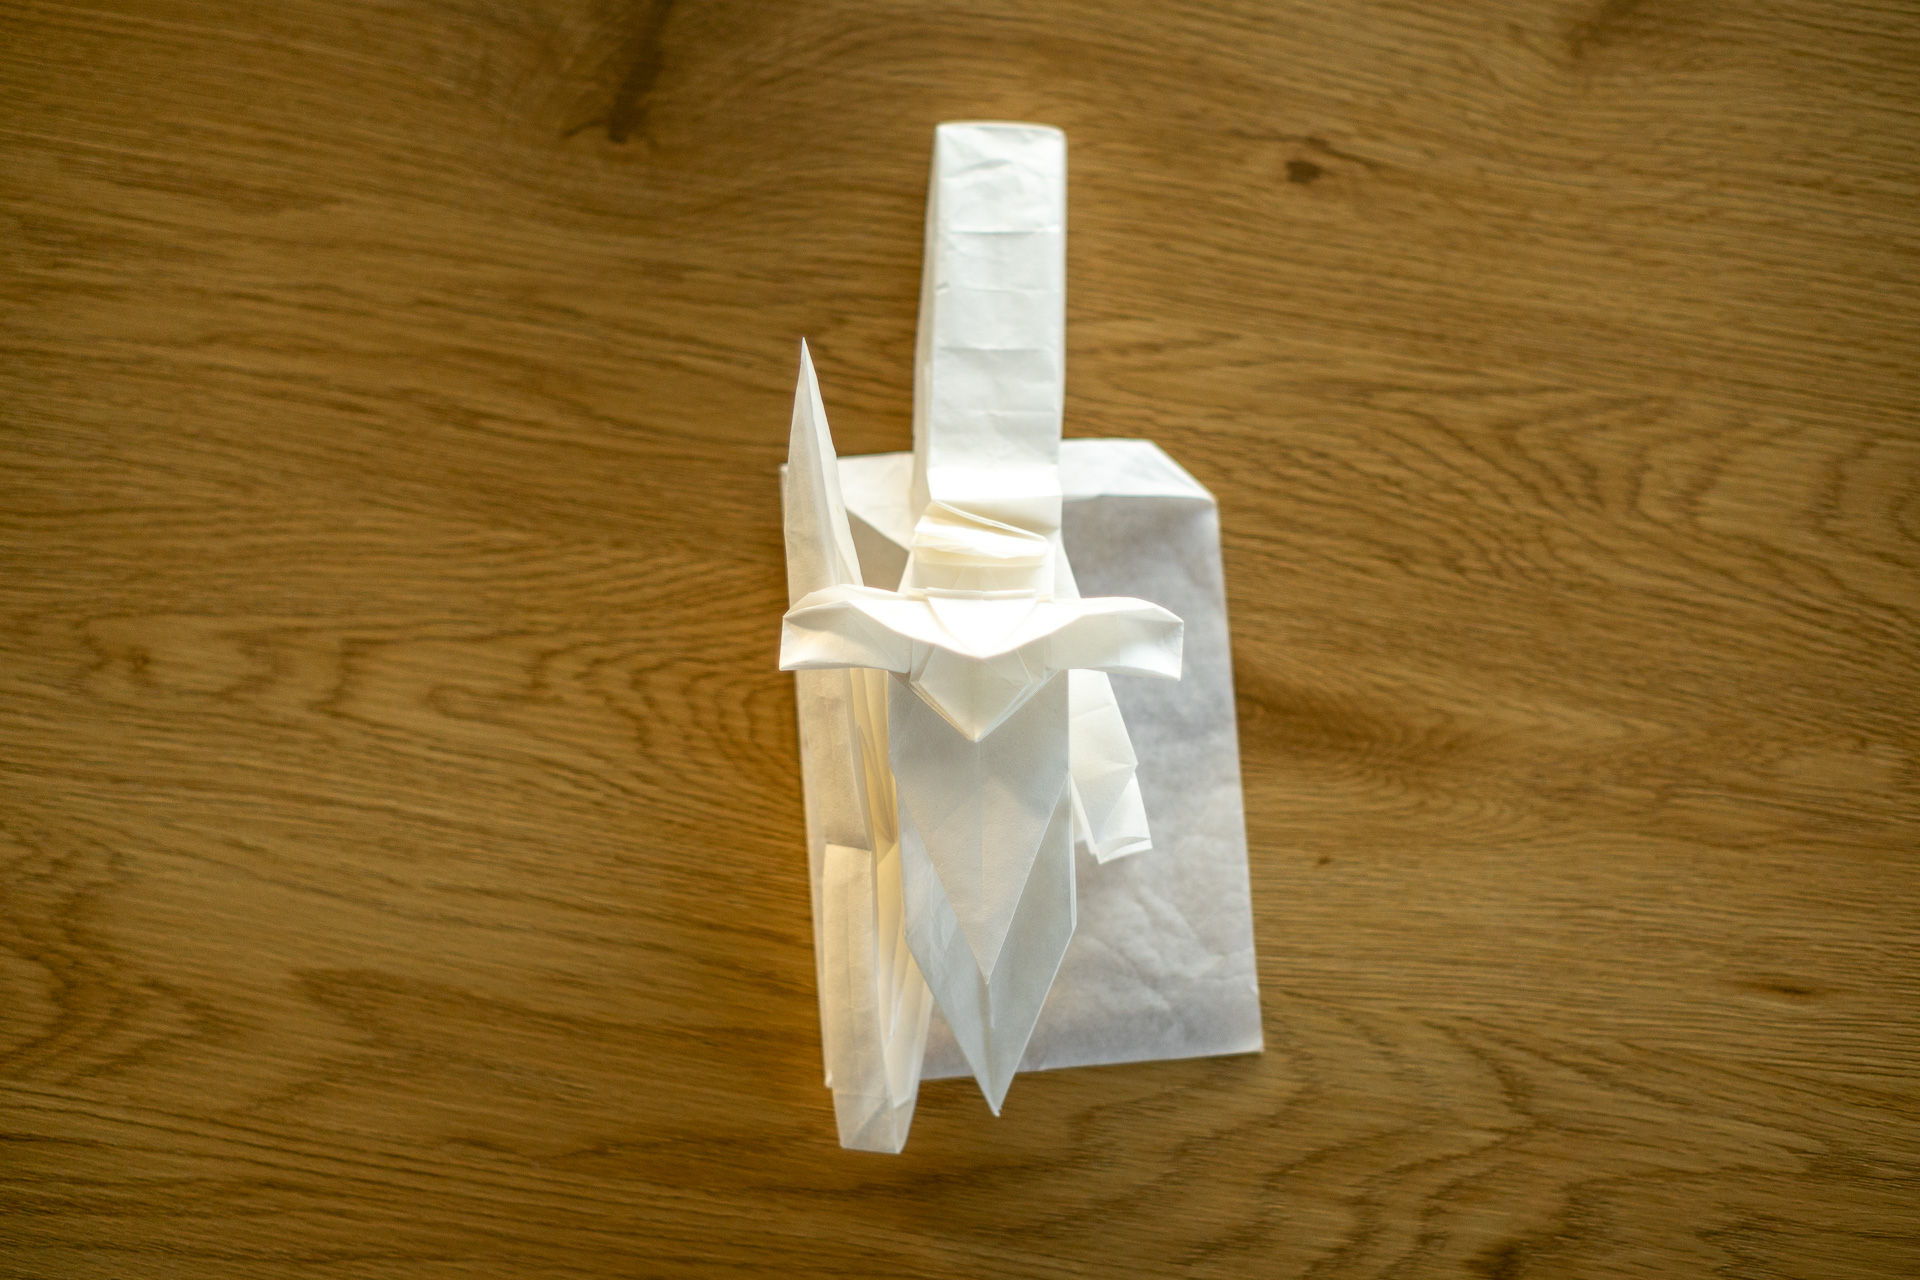
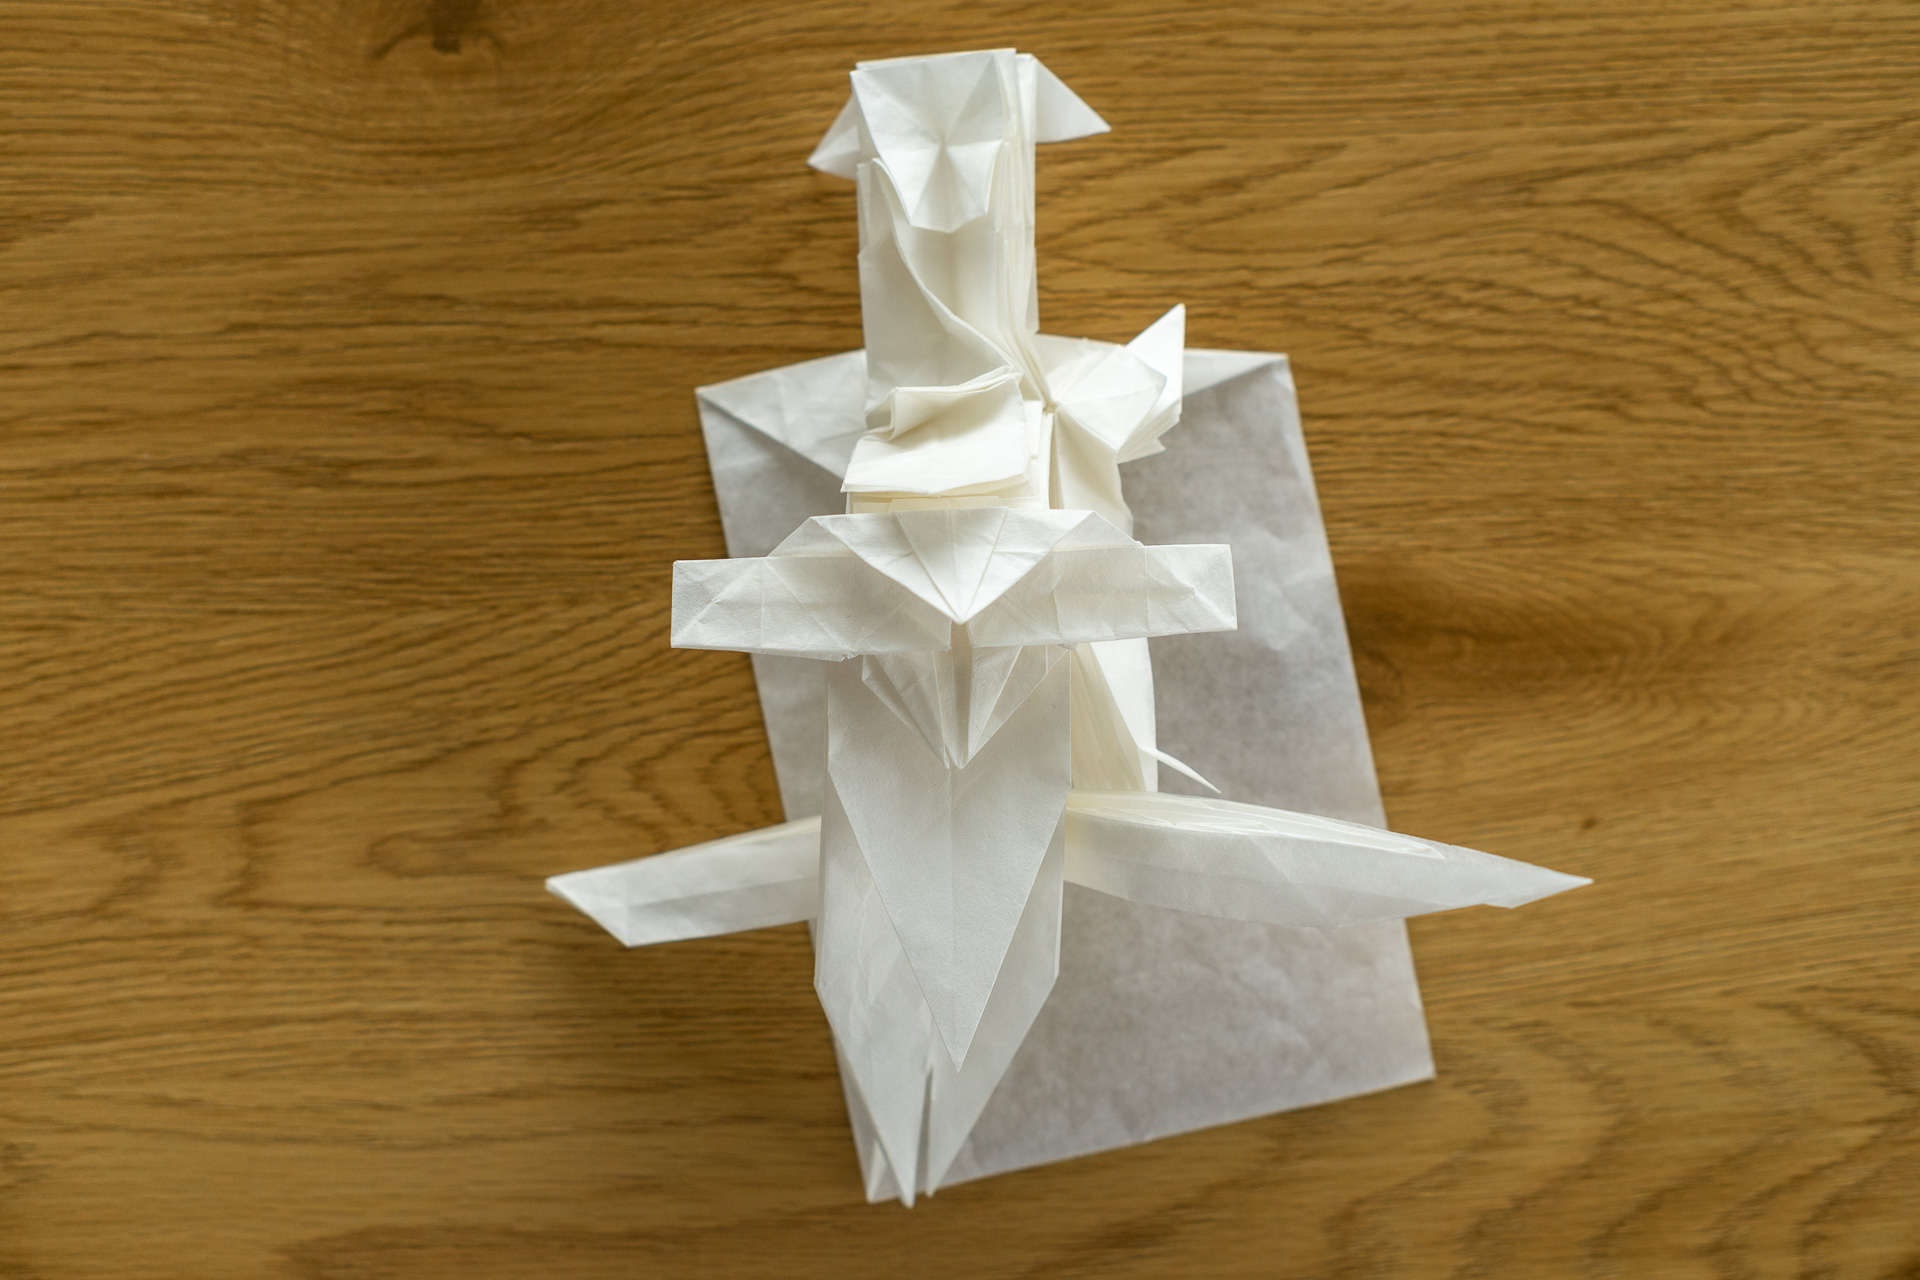
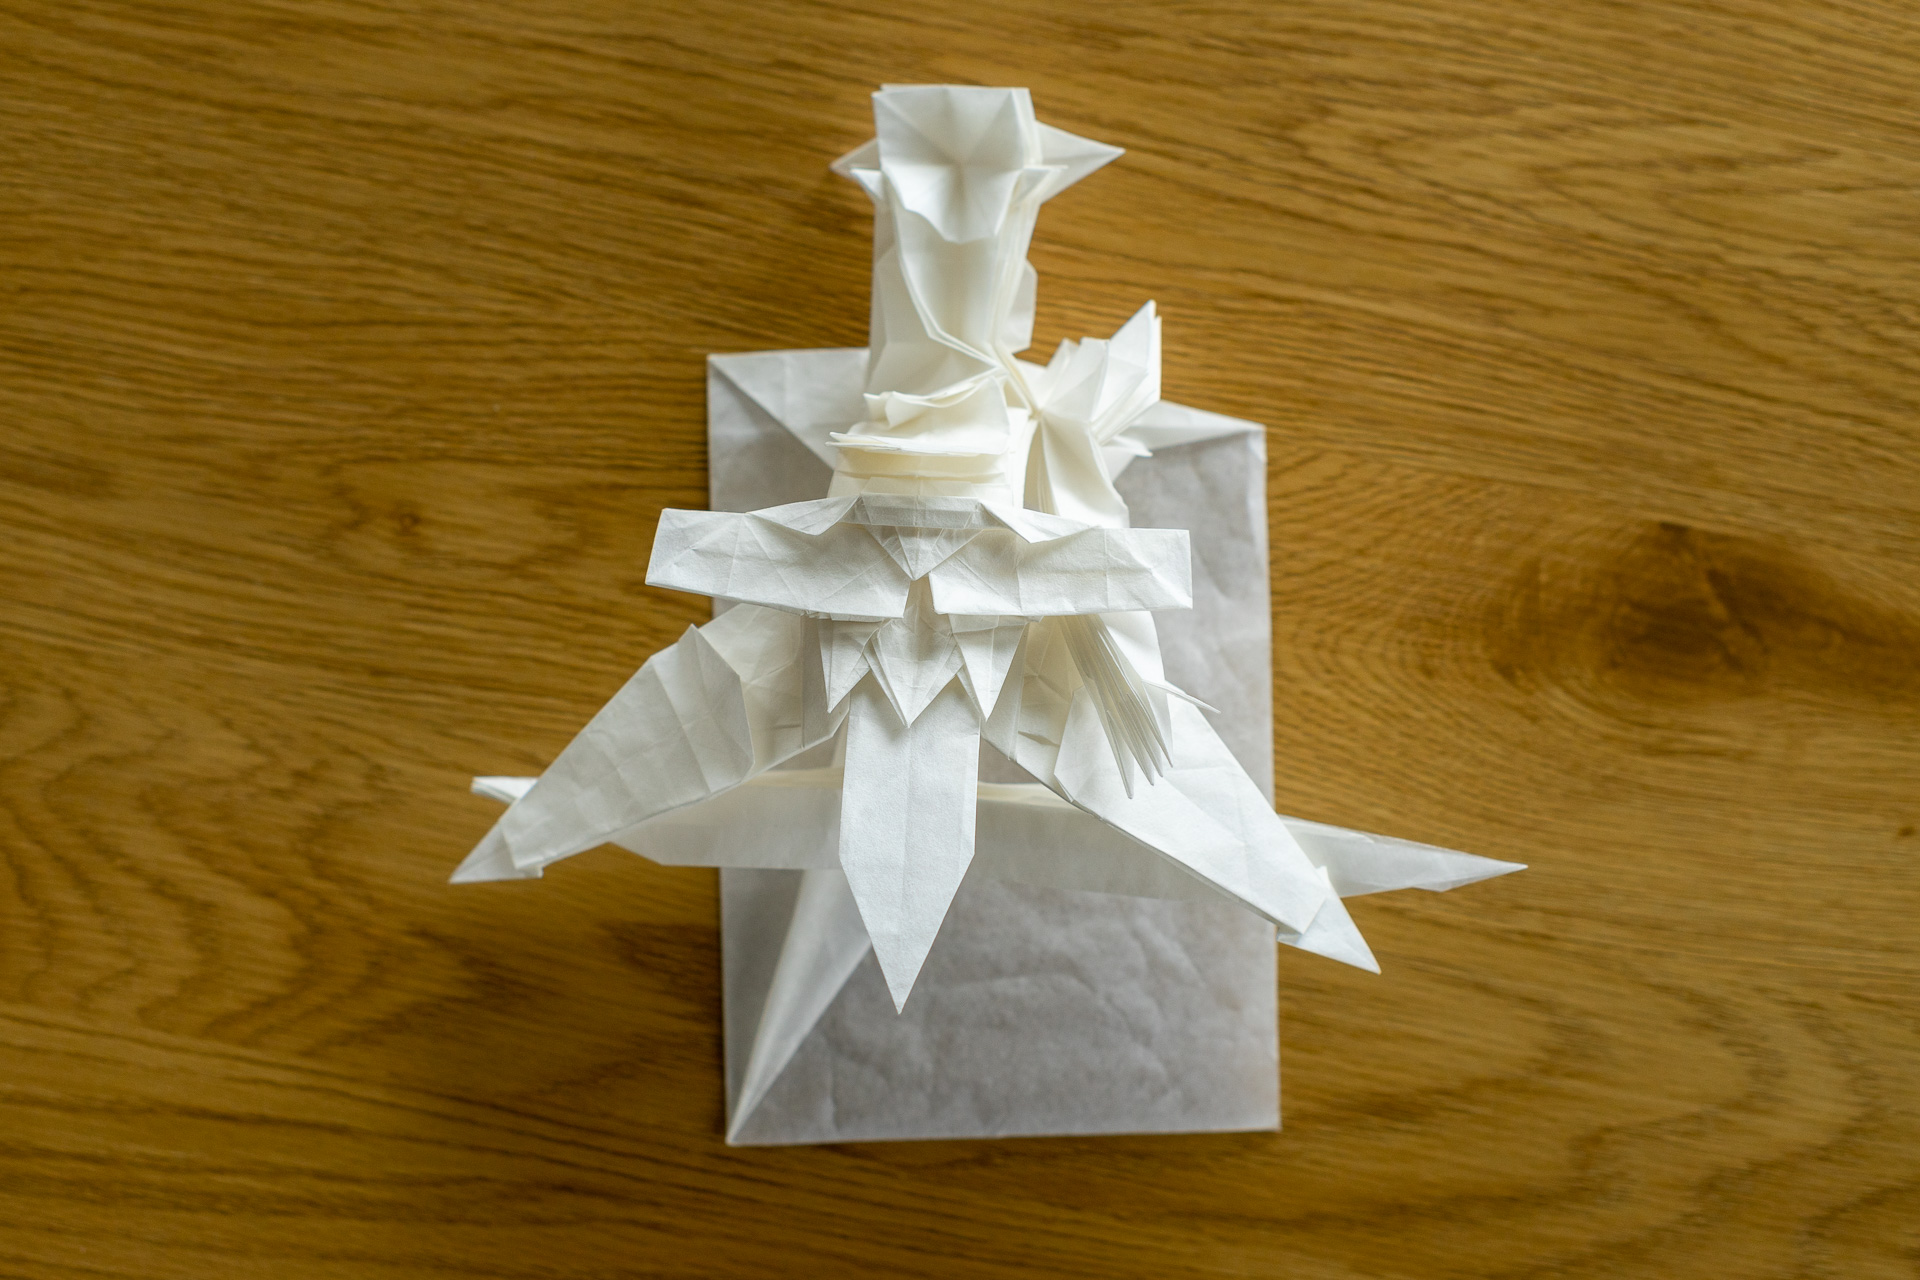
This section I’ll show as a short gallery to show how the figure was folded. The crease pattern was folded in the first 3 steps, and majority of the details were either planned or improvised to the figure after that.
One of the noticeable things in my designs are that they don’t use dense grids for the amount of detail they have. This figure improved the efficiency greatly compared to the Spear Warrior. Downside is that they are incredibly difficult and tedious to fold into the final shape.


Great article! This design kinds of reminds texture unwrapping in 3D modeling software but here you have the extra limitation that surface must be continuos because you cannot make cuts in the paper.
Considering the high efficiency requirements, I would assume that we don’t see computers creating complex origami designs from 3D models until we have general purpose AI to complete the task.
Thank you! It is indeed quite similar to a reversed process of UV unwrapping. Those constraints do make the process quite a bit more difficult, making non-convex shapes have been a challenge in origami since its beginning, and they still pose a problem when they are not possible to fold seamless.
There is already one algorithm that can turn 3D model into origami: https://www.researchgate.net/publication/315747461_Origamizer_A_Practical_Algorithm_for_Folding_Any_Polyhedron
However the computer algorithms can hardly make anything useful to fold. They create the reference points (that we have to measure by folding in the pre-creasing) in places that are very difficult to fold with a sequence. So these kinds of folding patterns are usually better when printed. Another challenge is that it can only do very simple 3D shapes with very low poly count, and the shape would need to be as convex as possible. Adding more polygons or non-convex shapes are going to explode the amount of folds needed to create the models, quickly becoming impractical for humans to fold. You can see that even a simple bunny will get rather dense in the folds, in traditional origami, such object could be folded a lot more easily. So the computer software are rather inefficient at creating patterns that have small amounts of folds, or making folds that are in convenient places for the references. My creations have so much detail and shapes, that they would be pretty much impossible to create with such algorithms.
I think it would need quite a bit of time until we could implement current theories to create similar patterns that I draw. I don’t think we even have all the theory required for it.
when are you giving the instructions of it.
Amazing stuff! Do you use software to lay out the 2D design? Or 3d model it? Does your paper have a grid or plot lines? Thanks!
Thank you! I use modded Orihime to draw the crease pattern, all the design process is done by manually drawing the pattern and/or folding a piece of paper. We don’t have readymade plot lines on our papers, since they are hand made and come in all sorts of random sizes. All the crease pattern lines are folded by hand; we use mathematical methods to fold virtually any grid division on paper.
Amazing stuff. Do you use software to lay out the 2D design? Or 3d model it? Does your paper have a grid or plot lines? Thanks!
好棒
amazing. i learnt a lot. thanks for sharing. looking forward for more design processes.